Why Even Use Manual Mode?
Manual mode is one of those mysteries that every street photographer has to solve at one point or another if they want to take full advantage of their camera’s potential. So, if you are struggling to make better images and you are looking for the next step, then manual mode will take you there.
Today we are going to show you not only how manual mode works, but how it can enhance your creative options when creating a photograph.
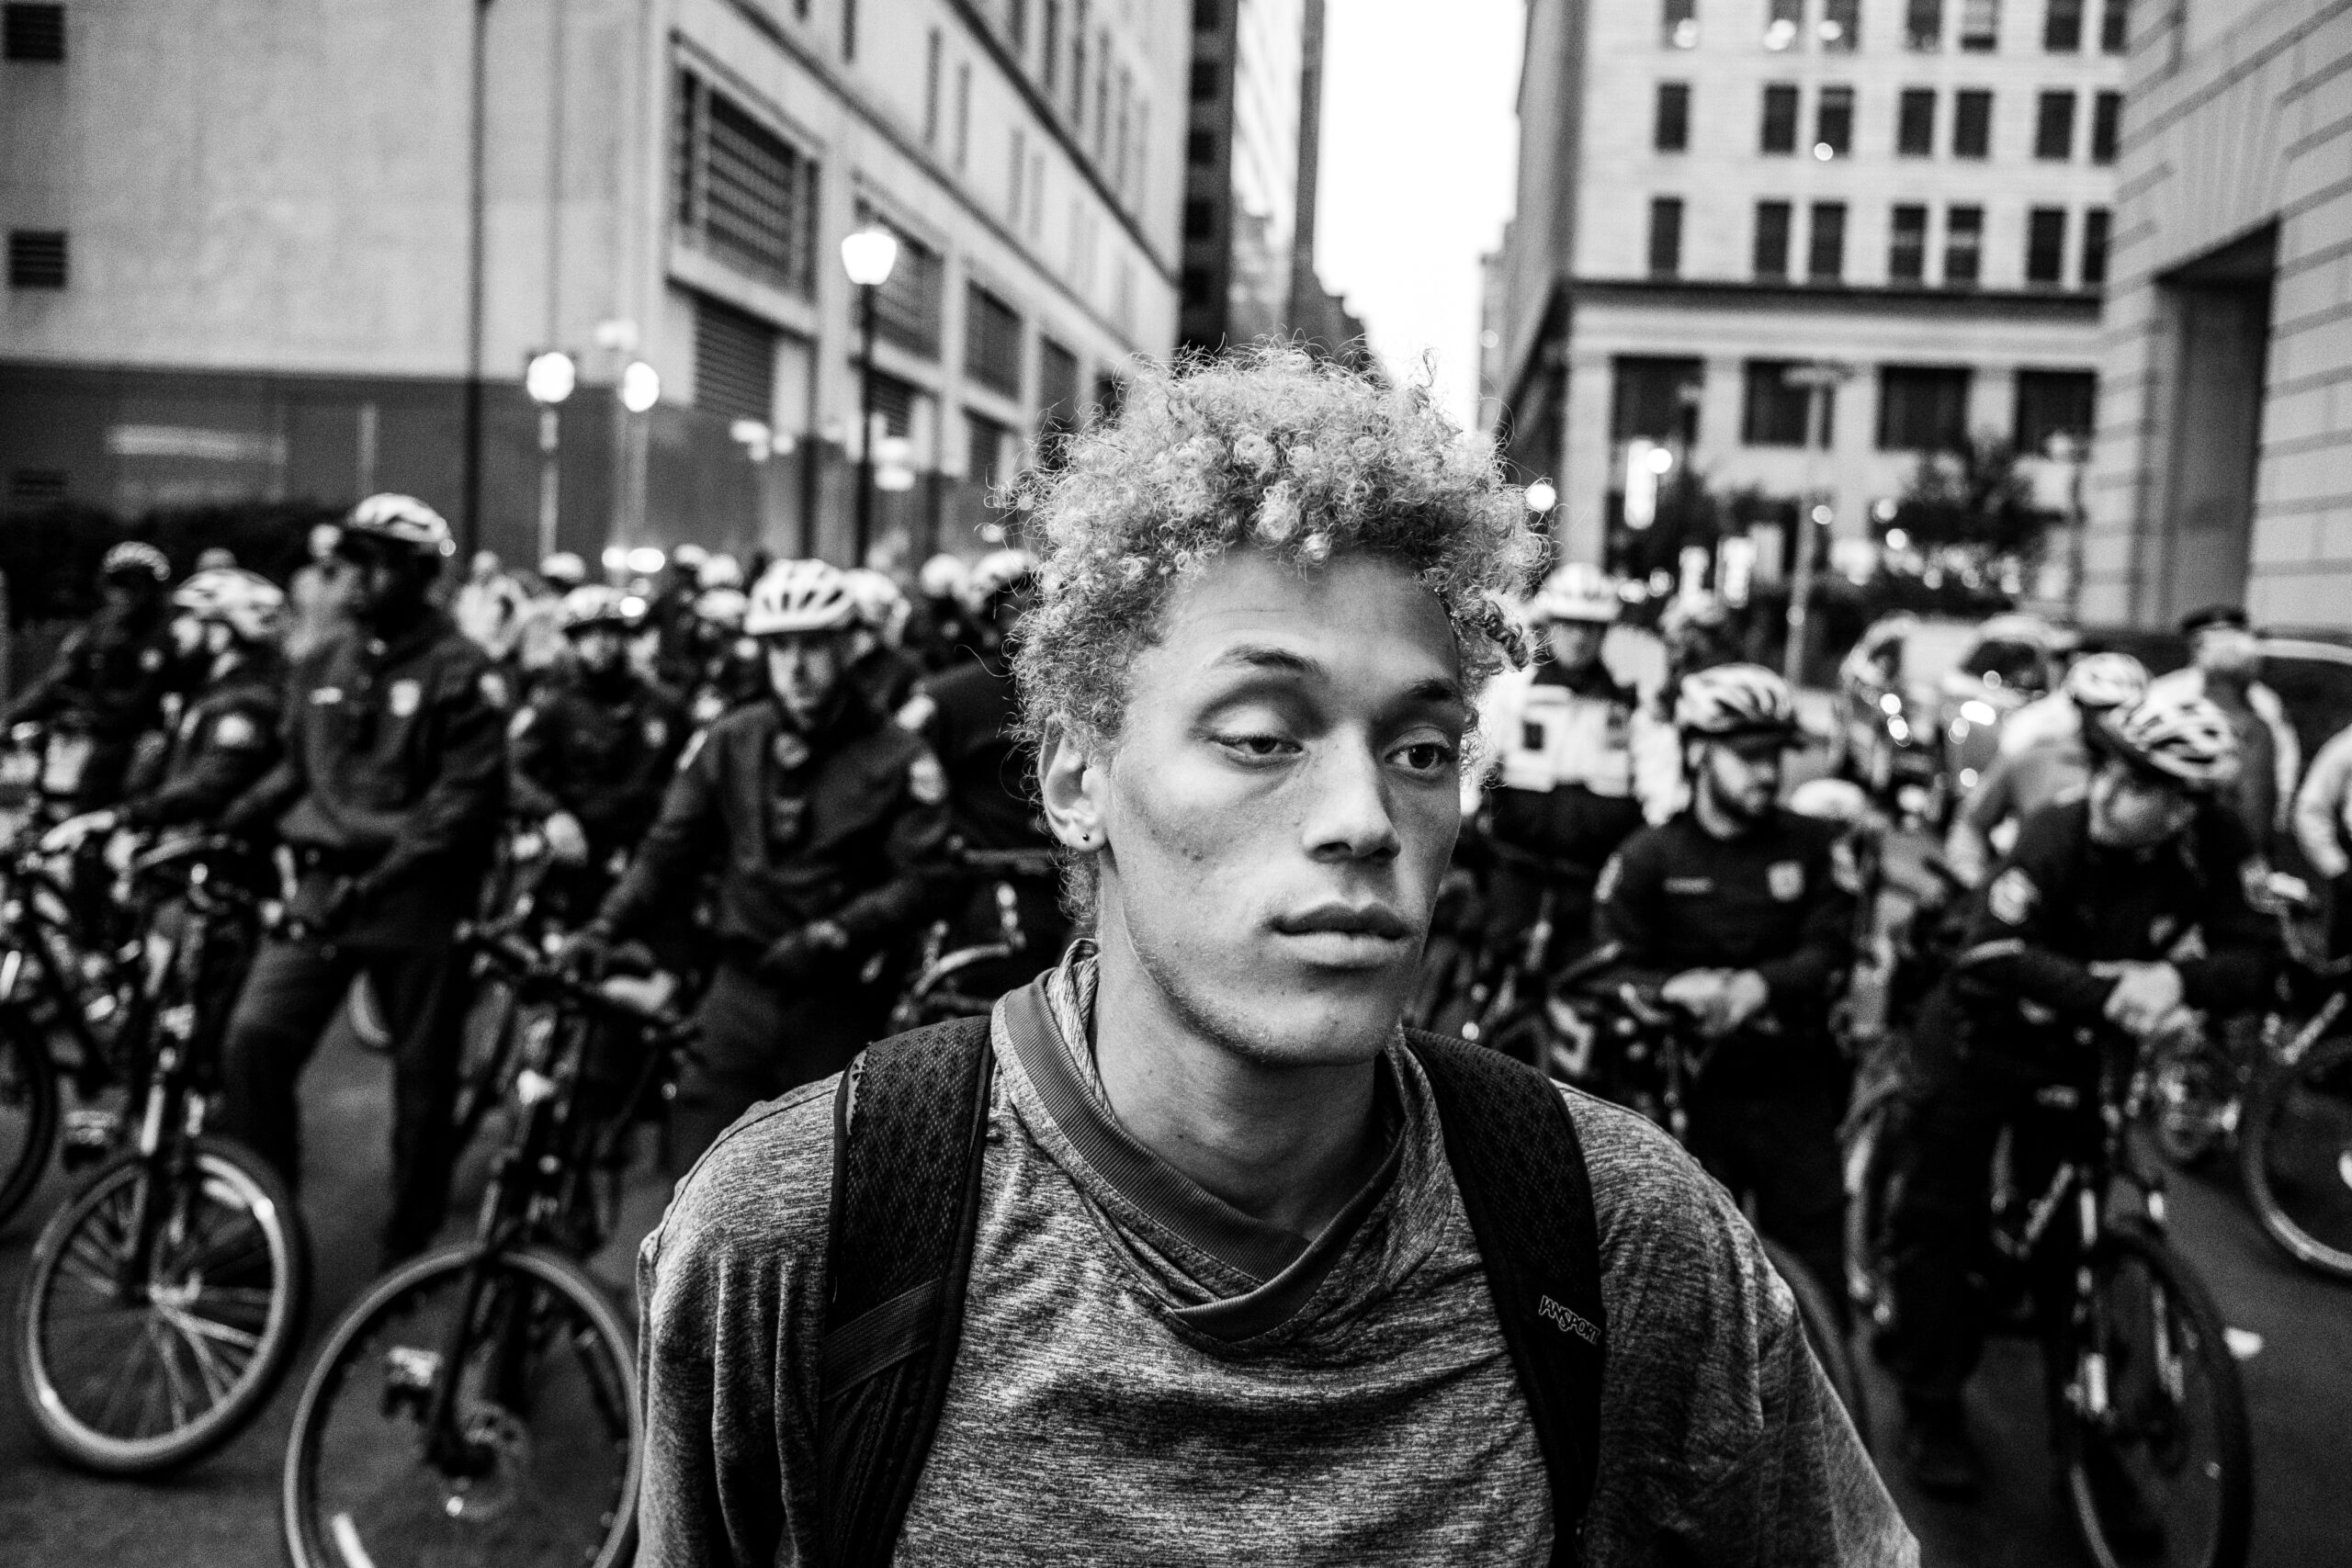
Photos like the ones below would be impossible to take if you relied on your camera’s automatic exposure mode.


The Basics
So first thing is first, make sure you have your camera with you and that you have a basic understanding of how to operate it. It can be a film camera, DSLR, Mirrorless, or even your phone. No matter what it will be helpful to hold something and follow along.
Make sure your camera is set in manual mode. This way all the changes you do will be reflected in your test images.
Now let’s start with the basics. What is exposure and how to read the light meter. If you already know this, then feel free to skip ahead using the headers.
Exposure
Exposure is just that, how much light is “exposed” or shown to your film or sensor. And we measure it in a thing called “stops”.
A stop is a doubling of the quantity of light entering your camera.
Stop (Noun):
A unit of change in photography indicating a doubling of light
E.g. “I am one stop overexposed”
Which is a weird thing to think about.
For example if I look into my light meter and it tells me I am 2 stops underexposed, then I would need 4x the amount of light to get the right exposure. Fortunately cameras are designed with this principle in mind and the built in controls can easily make these adjustments without complicated math.
Reading Your Meter
Most meters on modern cameras will read in terms of-stops of light under or overexposed, if your camera is a little bit older, then you will have an indicator telling you that you are overexposed or underexposed.
Meaning you are either letting in too much or too little light.
Overexposed = Too Much Light
Underexposed = Too Little Light
Here are some common types of meters you might see. Each of them is reading as the image being overexposed by 2/3rds of stop. The needle variant is common on Pentax cameras and older SLRs. The triangle and dot meter can be found on Leica and Nikon film cameras. The dots and numbers readout can be found on most digital cameras. Either way, you can see that all of them indicate proper exposure when the center of the range is selected.
For simplicity, we will assume that when our meter shows we are properly exposed that our photo is properly exposed.
However, often times I find proper exposure to be 1, 2 or 3 stops overexposed or underexposed. This can be due to a variety of factors like lighting conditions, creative considerations, the use of flash, etc… Street photography in particular exposes (pun intended) you to a variety of crazy situations which can force you to use your meter as a creative tool. I will cover this in a separate lesson(s) dedicated to reading your meter.
This image needed to be 2 stops under exposed in order to get the “right” exposure.
The New Exposure Triangle
When we talk about exposure a lot of people mention “the exposure triangle”. What this is describing is the relationship between: aperture, shutter speed, and ISO. I posted the diagram below, however I find this method of explaining the relationship to be overly simplistic and misleading.
I like to think about things in terms of a 3 way Venn diagram. It better shows the relationship that the settings have on your exposure. When you have properly adjusted each of the 3 setting then you will have found the perfect balance of settings to control light, depth of field, motion blur, and grain.
We will cover each setting each individually and then I will show you how they all work together to make a picture. We could dedicate multiple lessons to each of the 3 settings, however this should give you the basics of how each of them works and their impact on the image.
Shutter Speed
Let’s start with shutter speed. The shutter is a little curtain inside your camera that opens up to allow light in and closes to stop light from entering. This controls how much light hits your sensor or film.
The mirror lifts up in a SLR camera and the shutter whizzes by. Although the shutter was open for a long time, the actual curtains are too fast for the eye to see.
The slower the shutter speed the more light that enters your camera and the faster the shutter speed the less light enters your camera.
Fast shutter speed = less light
Slow shutter speed = more light
Pretty simple right.
We measure shutter speeds in fractions of seconds, so if you look on your camera you will see a number that says 125. That means our shutter is open for 1/125 of a second.
These are some common shutter speeds:
1/8, 1/15, 1/30, 1/60, 1/125, 1/250, 1/500, 1/1000
However, some cameras have shutter speeds as long as 30 seconds or as fast as 1/8000th of a second.
At the lower end around 1/8th of a second we are keeping the shutter open for a while, letting in a lot of light. At the upper end around 1/1000 of a second, the shutter is only open for a brief moment of time, so only a little bit of light enters the camera.
If you notice each shutter speed is double the previous, that is because each one is letting in 2x as much light as the previous or as we call it in the photography world a “stop”. Digital cameras will probably have subdivisions of these in ⅓ stop increments as well.
So if my meter shows that I am underexposed by 2 stops, I can move from 1/250 to 1/60 and reach perfect exposure.
Motion Blur
However, shutter speed affects more than just how bright your image is, it also controls how “frozen” your motion is.
When I leave my shutter open for 1/60th the camera’s sensor or film is being exposed to light for a relatively long time, so things in the scene or you have a chance to move and create what we see as motion blur.
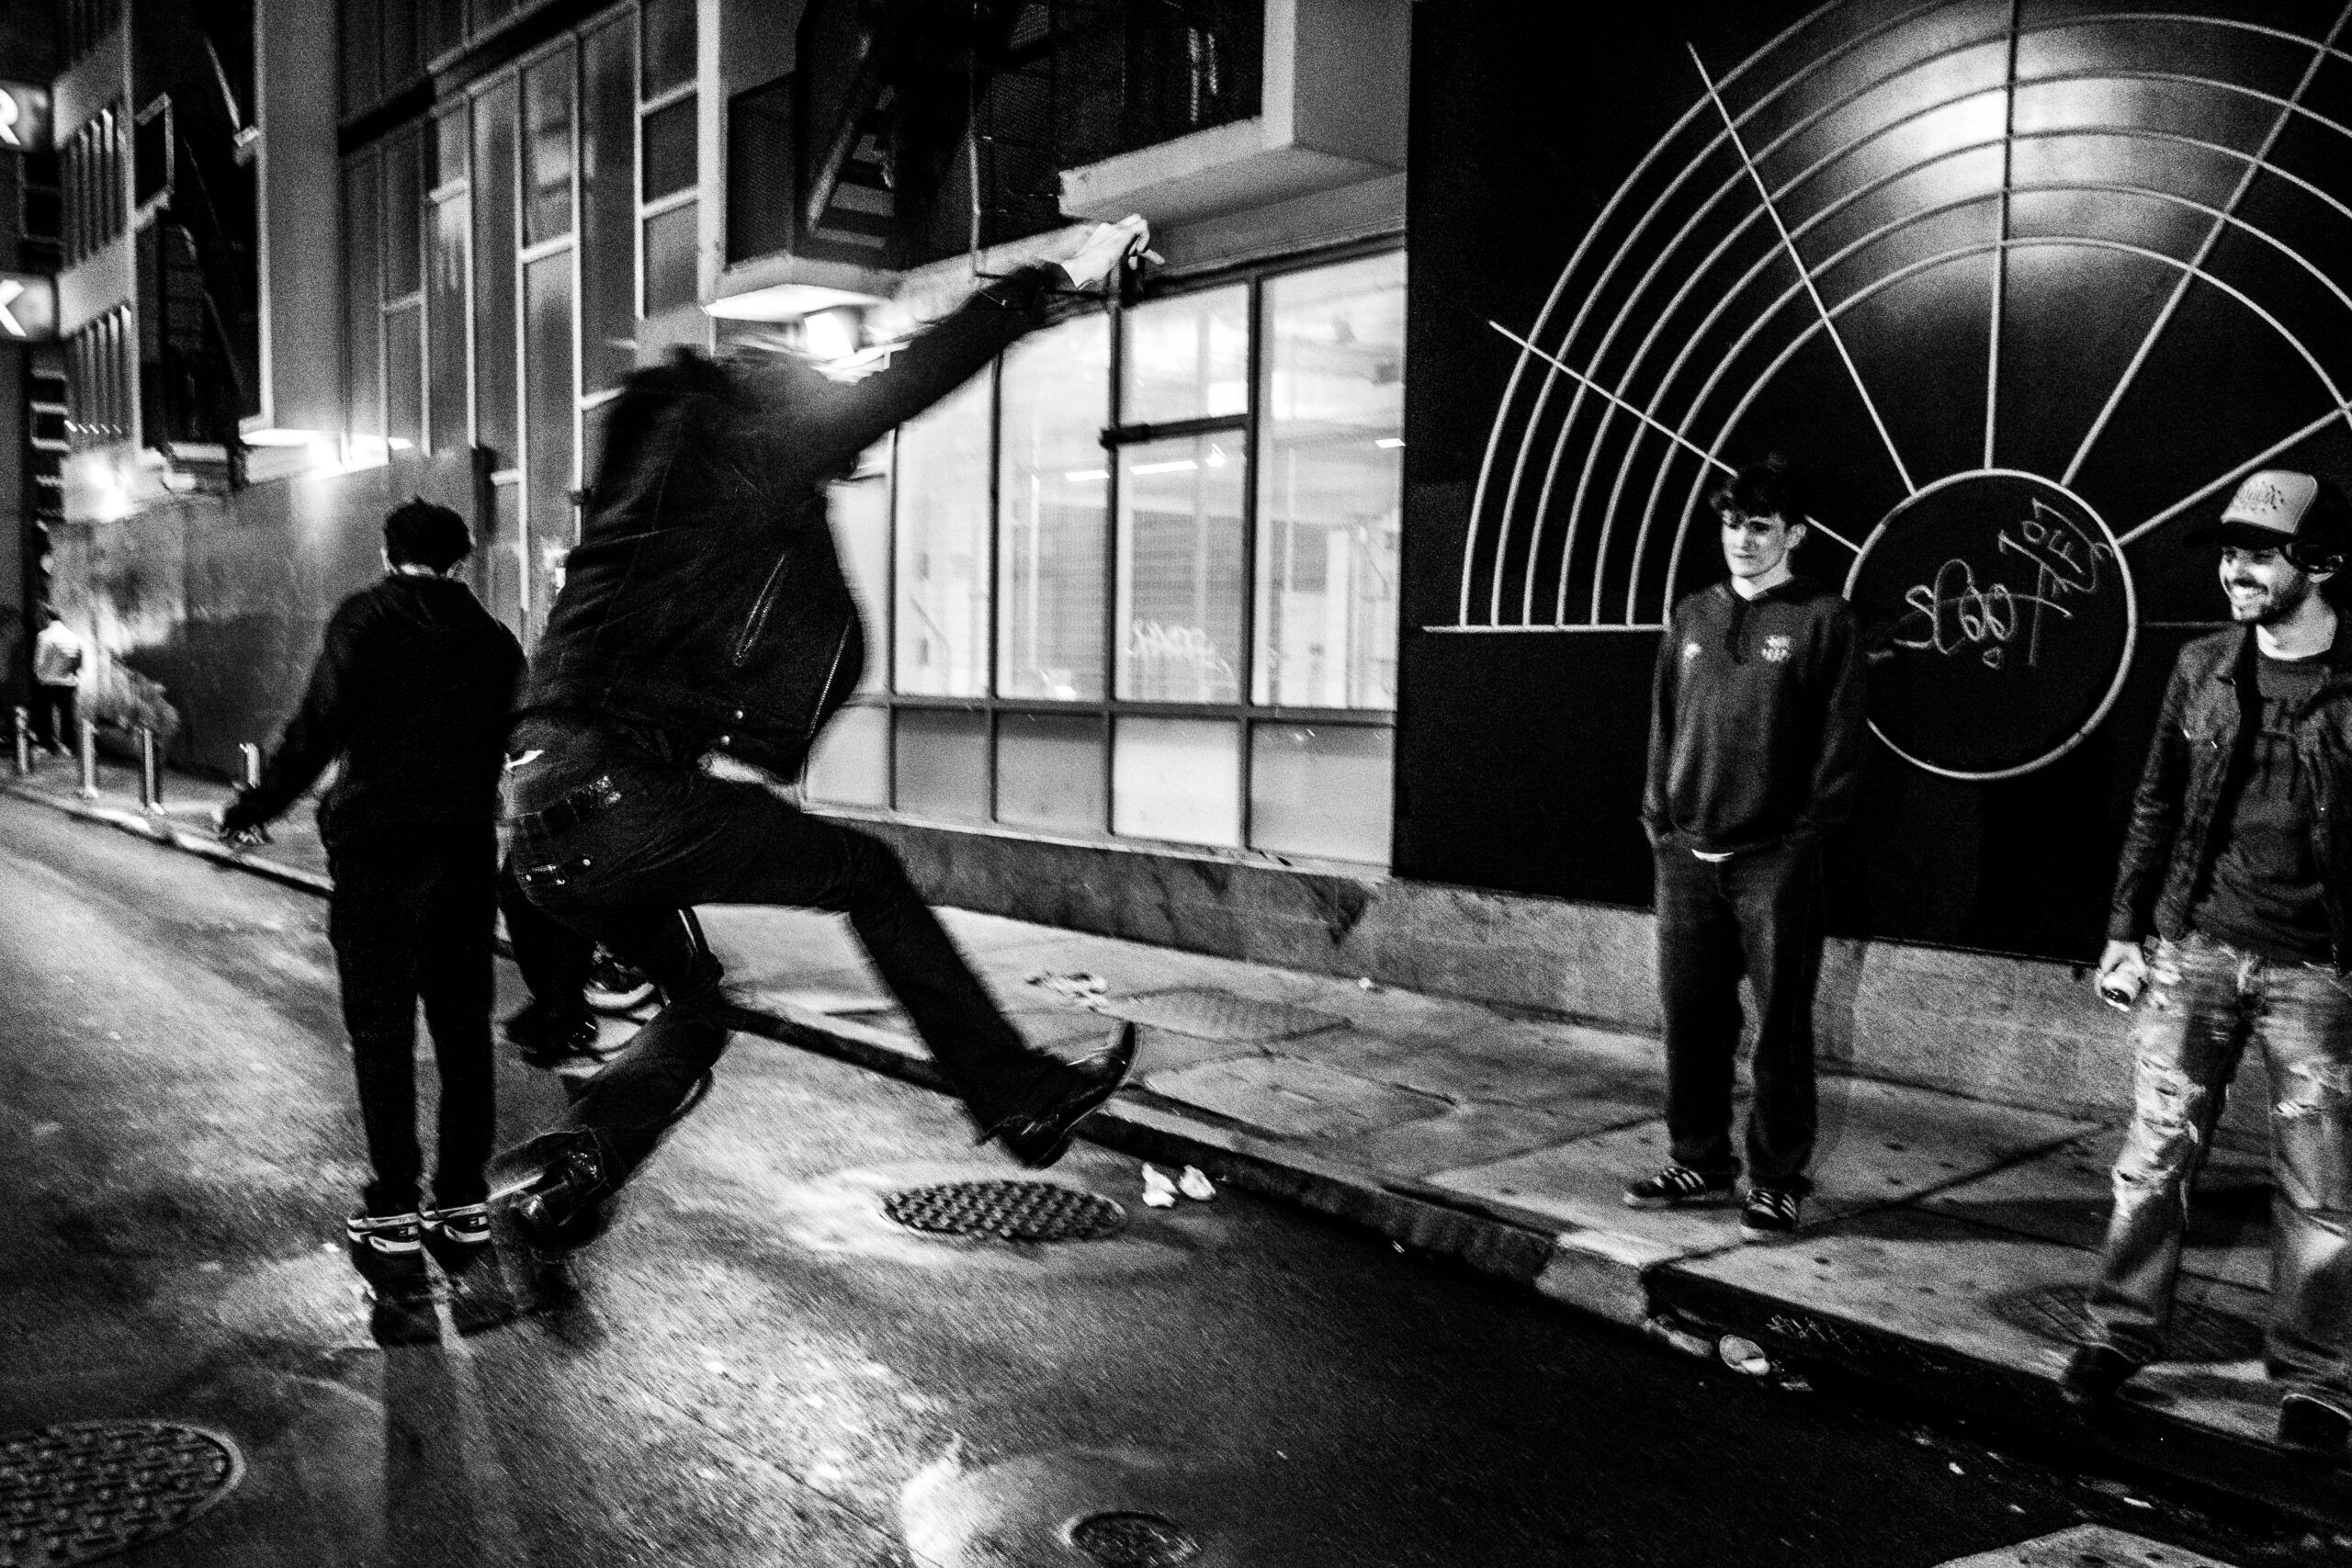
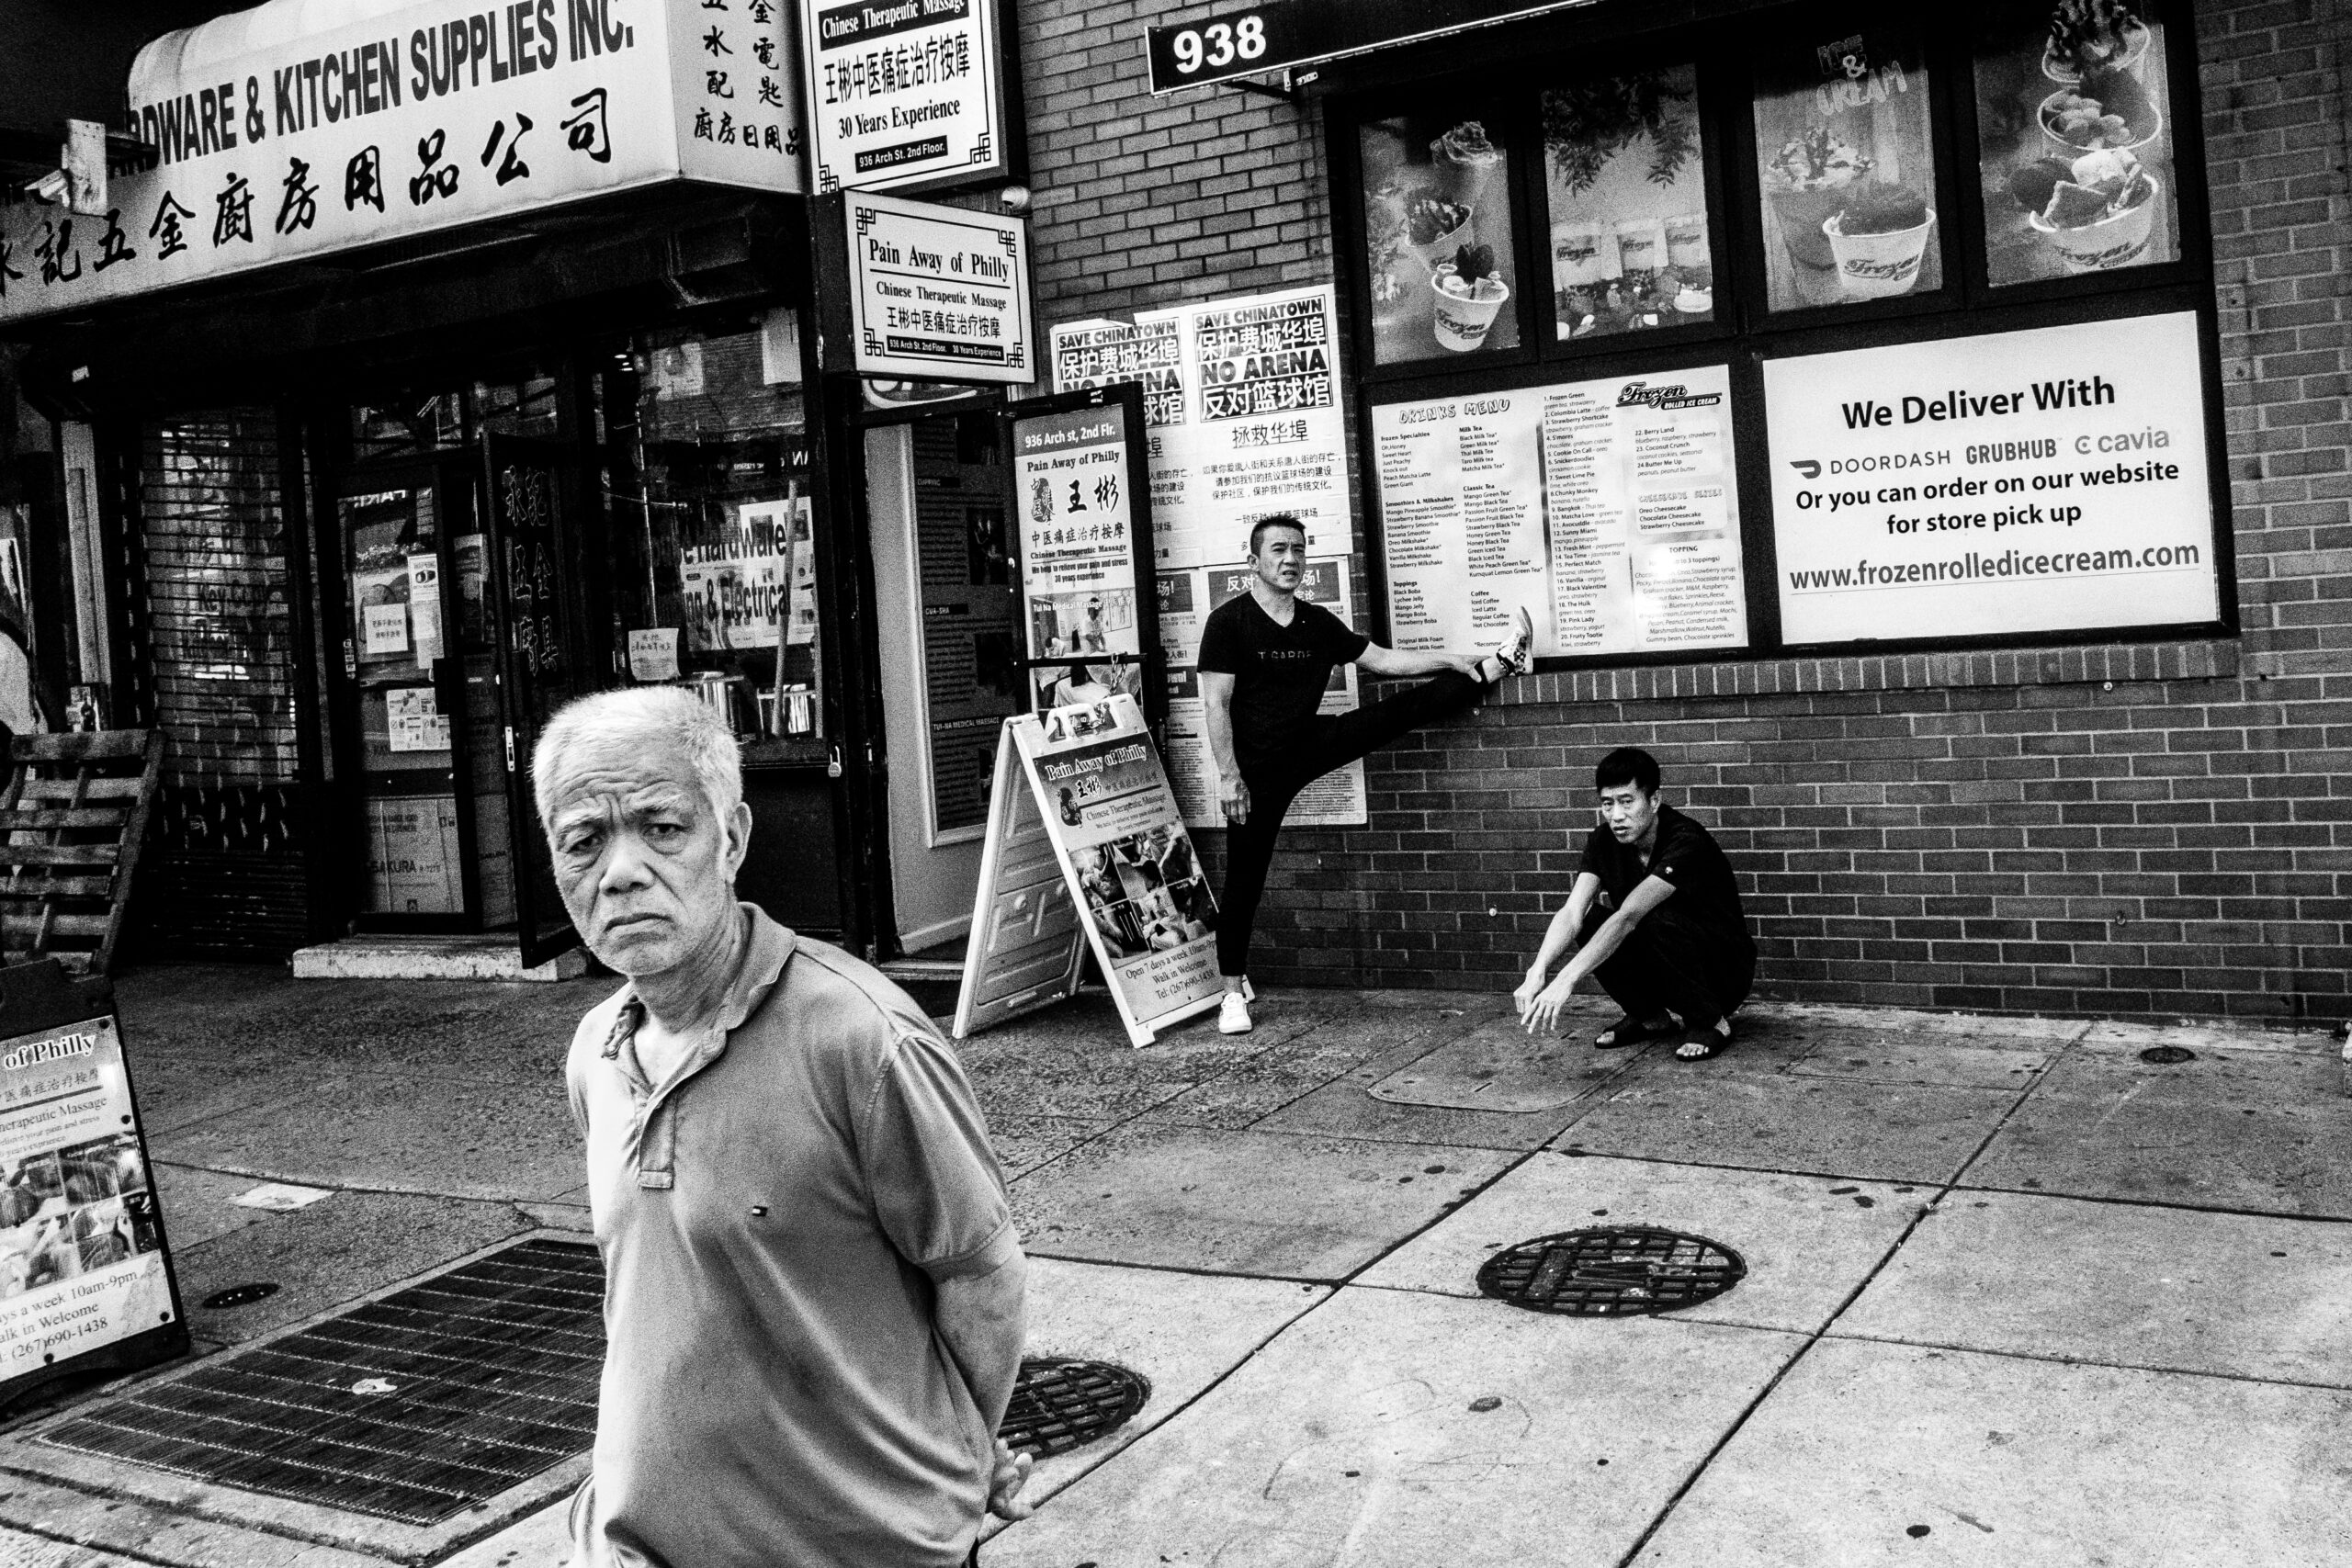
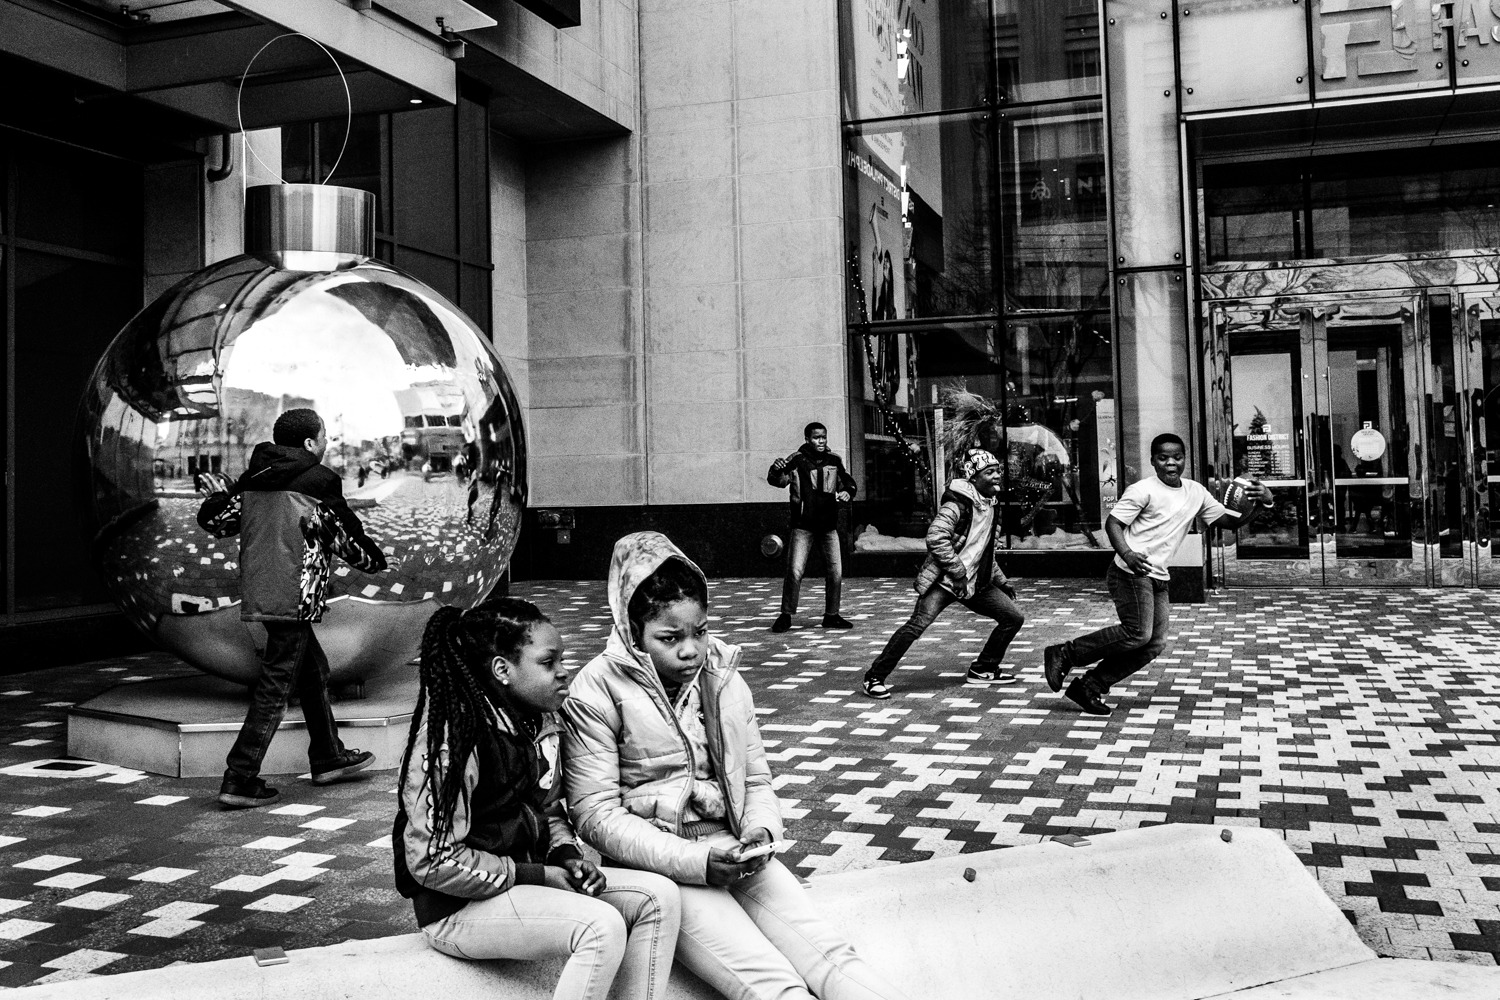
Slow Shutter Speed at 1/60th of a second. Notice how the person jumping has motion blur.
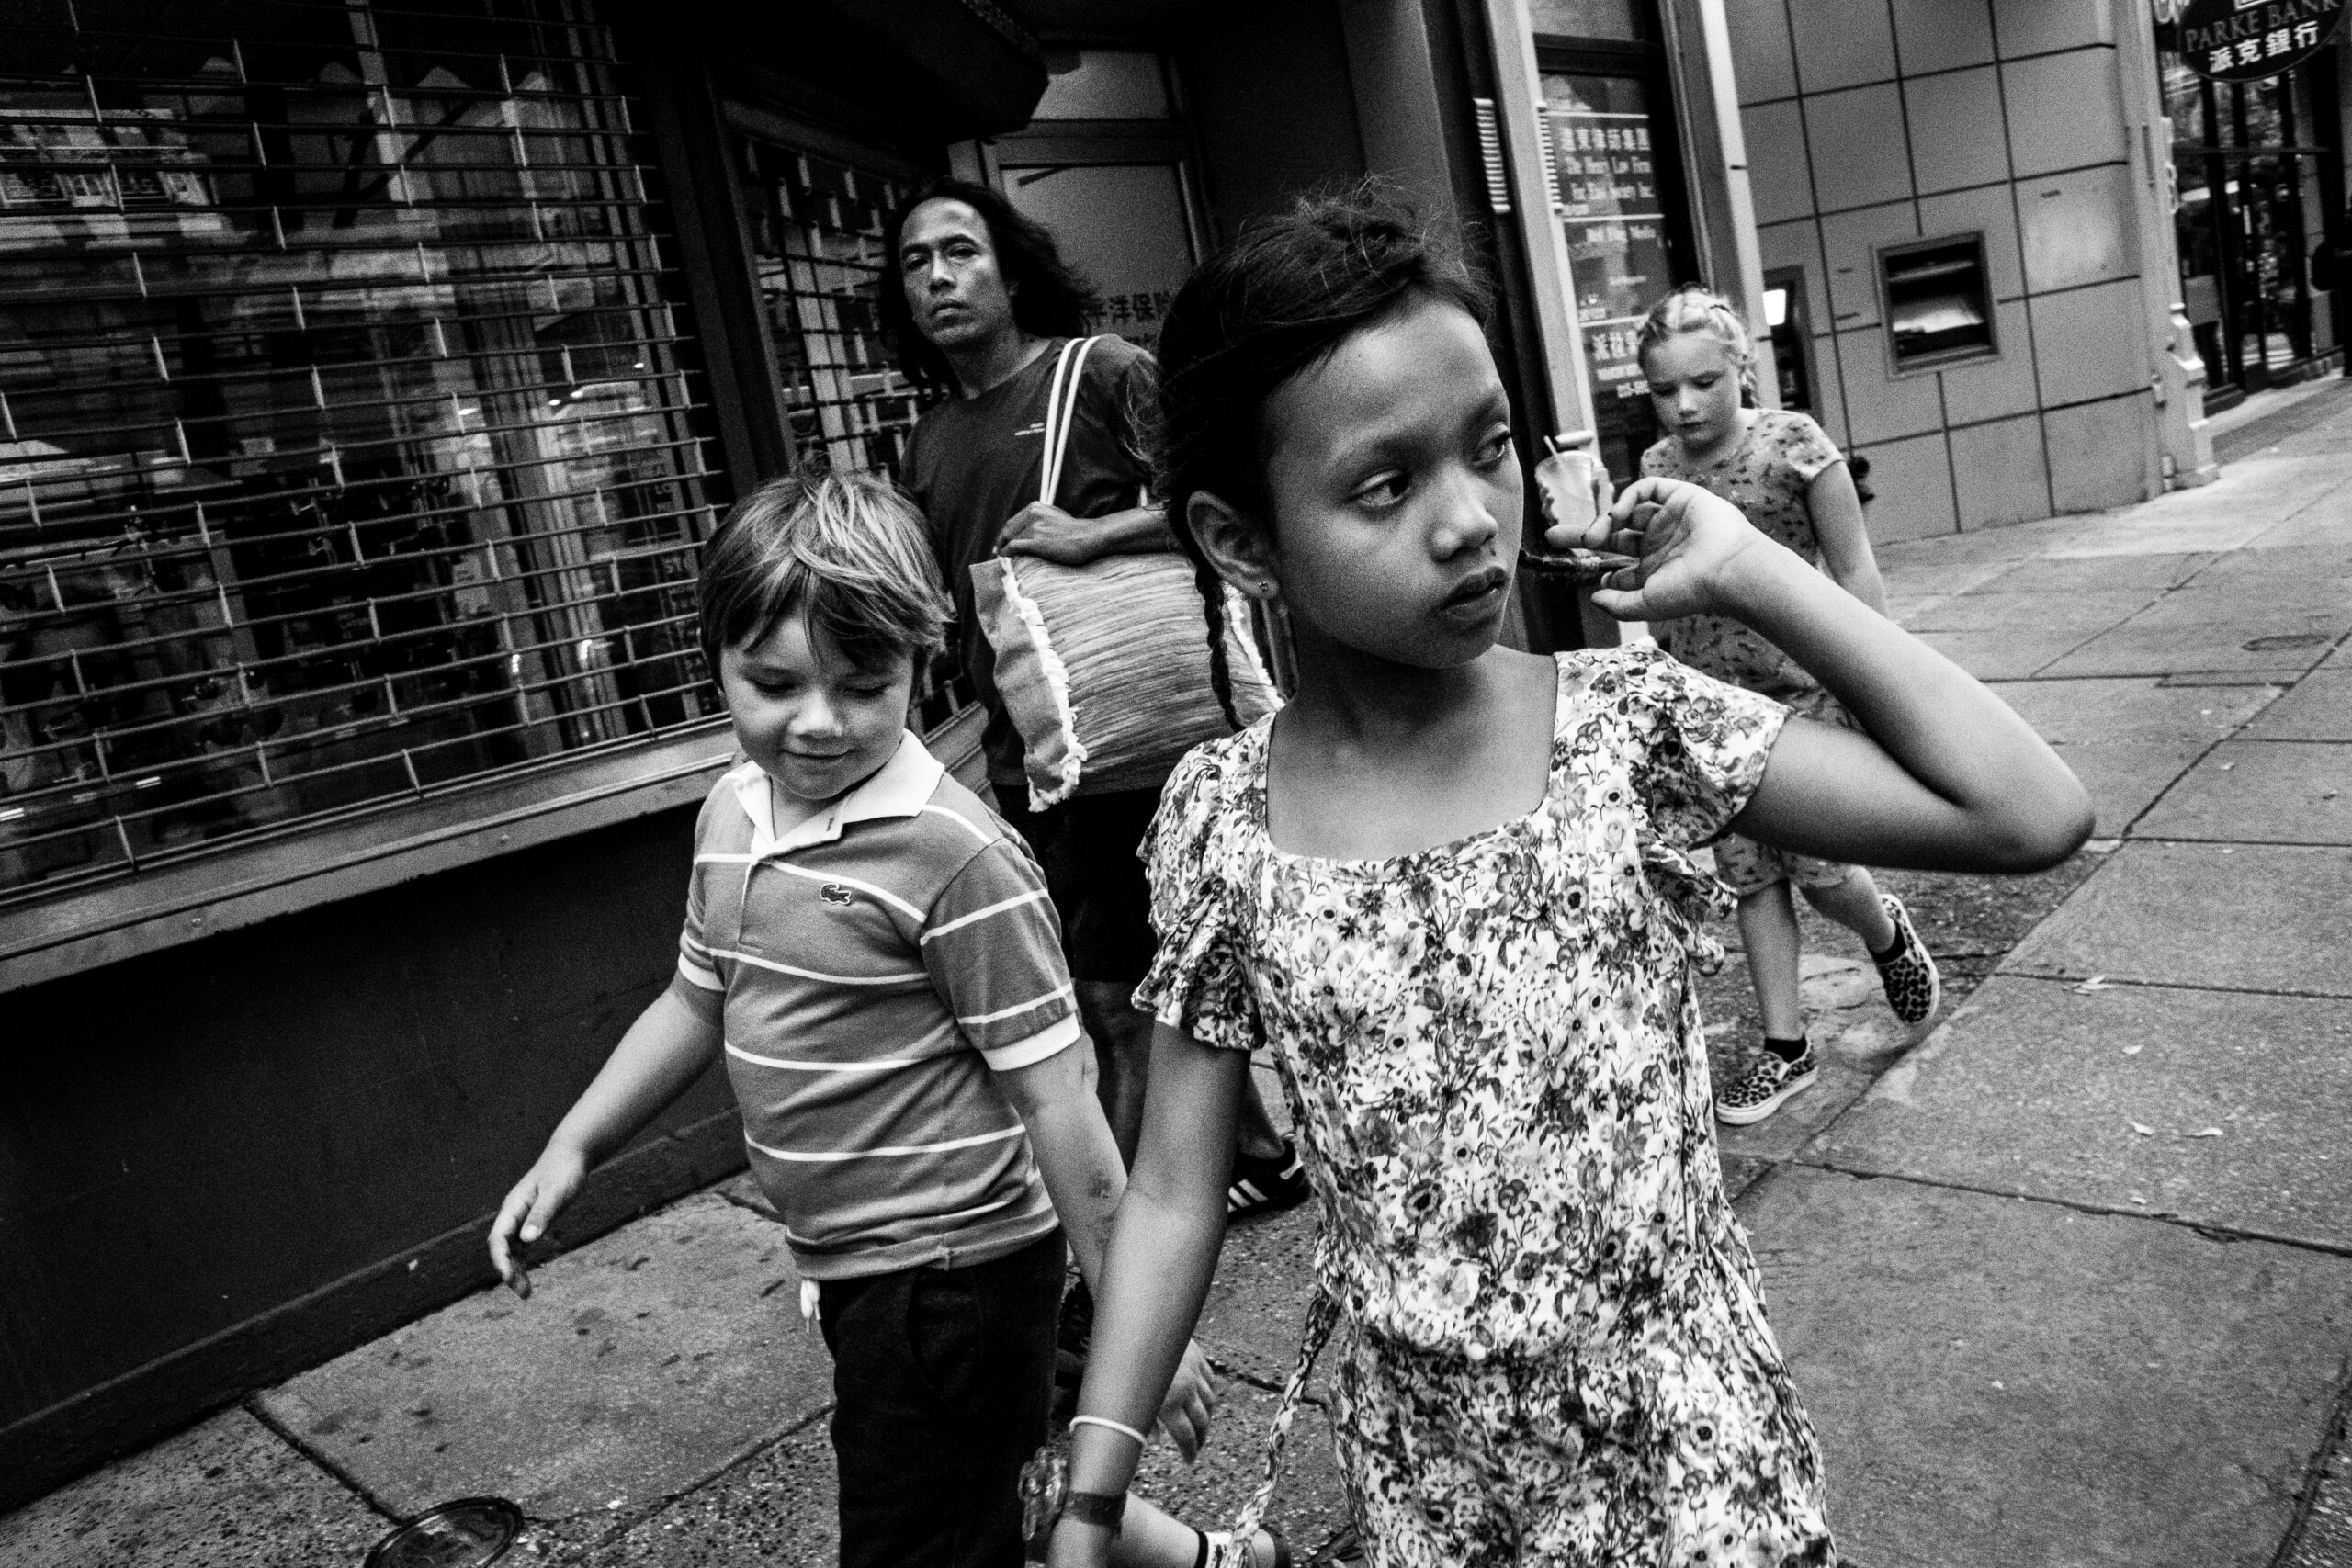
However, if I use a fast shutter speed like 1/1000th or 1/500th of a second then things in the scene get frozen in place.
This is an important setting to experiment with because motion blur can add depth and interest to your image. You can even add intentional motion blur by moving the camera while the shutter is open.
Slow shutter speed = more motion blur
Fast shutter speed = less motion blur
My Shutter Speed Preferences For Street Photography
For example, I like to keep my photos around 1/1000 of a second, which is a very fast shutter speed. I like this shutter speed for two reasons.
- I often shoot while weaving in out of crowds. So I want to avoid any motion blur from my hands accidentally shaking the camera while taking the photo
- I just like crisp frozen looking images. This is more of a taste thing, and tastes evolve. Recently I have been playing with really long shutter speeds like 1/15 to intentionally add significant motion blur and using flash to freeze the motion on top of the blur (that is a lesson for another day).
However, there is no one shutter speed that works for every situation, even though I often shoot at 1/1000th you can equally find me shooting at 1/60th. It really all depends on the the scene, the light, and the other settings I am prioritizing.
For example in winter, the light is not as strong in Philadelphia, so I will constantly be slowing down my shutter in order to get more light.
This is one where it helps to experiment a bunch and try out all the shutter speeds and see what works best for you. I highly recommend going out one day and trying to make pictures with as many different shutter speeds as possible, to get a feel for what the various speeds look like and how you might use them for different effects or lighting situations.
Aperture
Up next we have aperture, but what the heck is an aperture?
It is simply a hole that expands and contracts to control the amount of light that enters your camera and hits the sensor or film.
The aperture blades in your lens expand and contract to change the size of the hole that projects the image onto your film or sensor.
Bigger hole = more light
Smaller hole = less light
On your camera you will either have an aperture setting or a ring on your lens. And it will have these weird numbers on it. 2,2.8,4,5.6,8,11,16,22 etc…
Those are what we call f-stops.
There is some fancy math you can read here that will explain these numbers are actually denominators in an equation that determines aperture size. However, don’t get caught up trying to understand the math. Knowing the math will not help you become a better photographer.
Just know that each f-stop correlates to a specific sized hole in your lens.
Lower numbers like f/1.4 = bigger holes = more light.
Bigger numbers like f/22 = smaller holes = less light.
Gotta love how confusing that can get.
So when you hear photographers reference I shot that at a smaller aperture or stopped down, they are referencing the size of the hole, not the number. So the phrase “I shot that stopped down” meant they were shooting at a smaller aperture of f/16 or f/22, not a bigger one like f/1.4 or f/2.8.
Stops of Light
Each number on this lens represents a “stop” of light. Which you remember from before, is a doubling of light.
So when we go from f/4 to f/2.8, we are actually doubling the amount of light entering the lens. Remember the smaller the number, the bigger the hole, the more light in.
The numbers are standardized on every lens or camera system. And they go as follows. Your lens may not have all of these numbers, or your camera may have sub-divisions of these numbers in ⅓ or ½ increments.
f/1, f/1.4, f/2, f/2.8, f/4, f/5.6, f/8, f/11, f/16, f/22, f/32
This is important because let’s say our meter shows that we are 1 stop overexposed and we are at f/5.6. Then if we stop down and move to f/8 we will be perfectly exposed.
Depth of Field
But how does going from say f/2.8 to f/8 change the image other than making it darker. Well it affects how much of the image is in focus. This is not if the image is in focus, but how large of a range around our critical focus point is in focus. We refer to that as “depth of field”
For example this portrait was shot at f/2.8 and you can see that only really the subject’s face is in good focus. The rest has this beautiful blurring effect. And that is because f/2.8 gave me a very shallow depth of field.
Now if we look at this image, I shot this one at f/11 because I wanted as much as possible in focus. You can see that the majority of the image is in focus from foreground to background.
So to bring it all home.
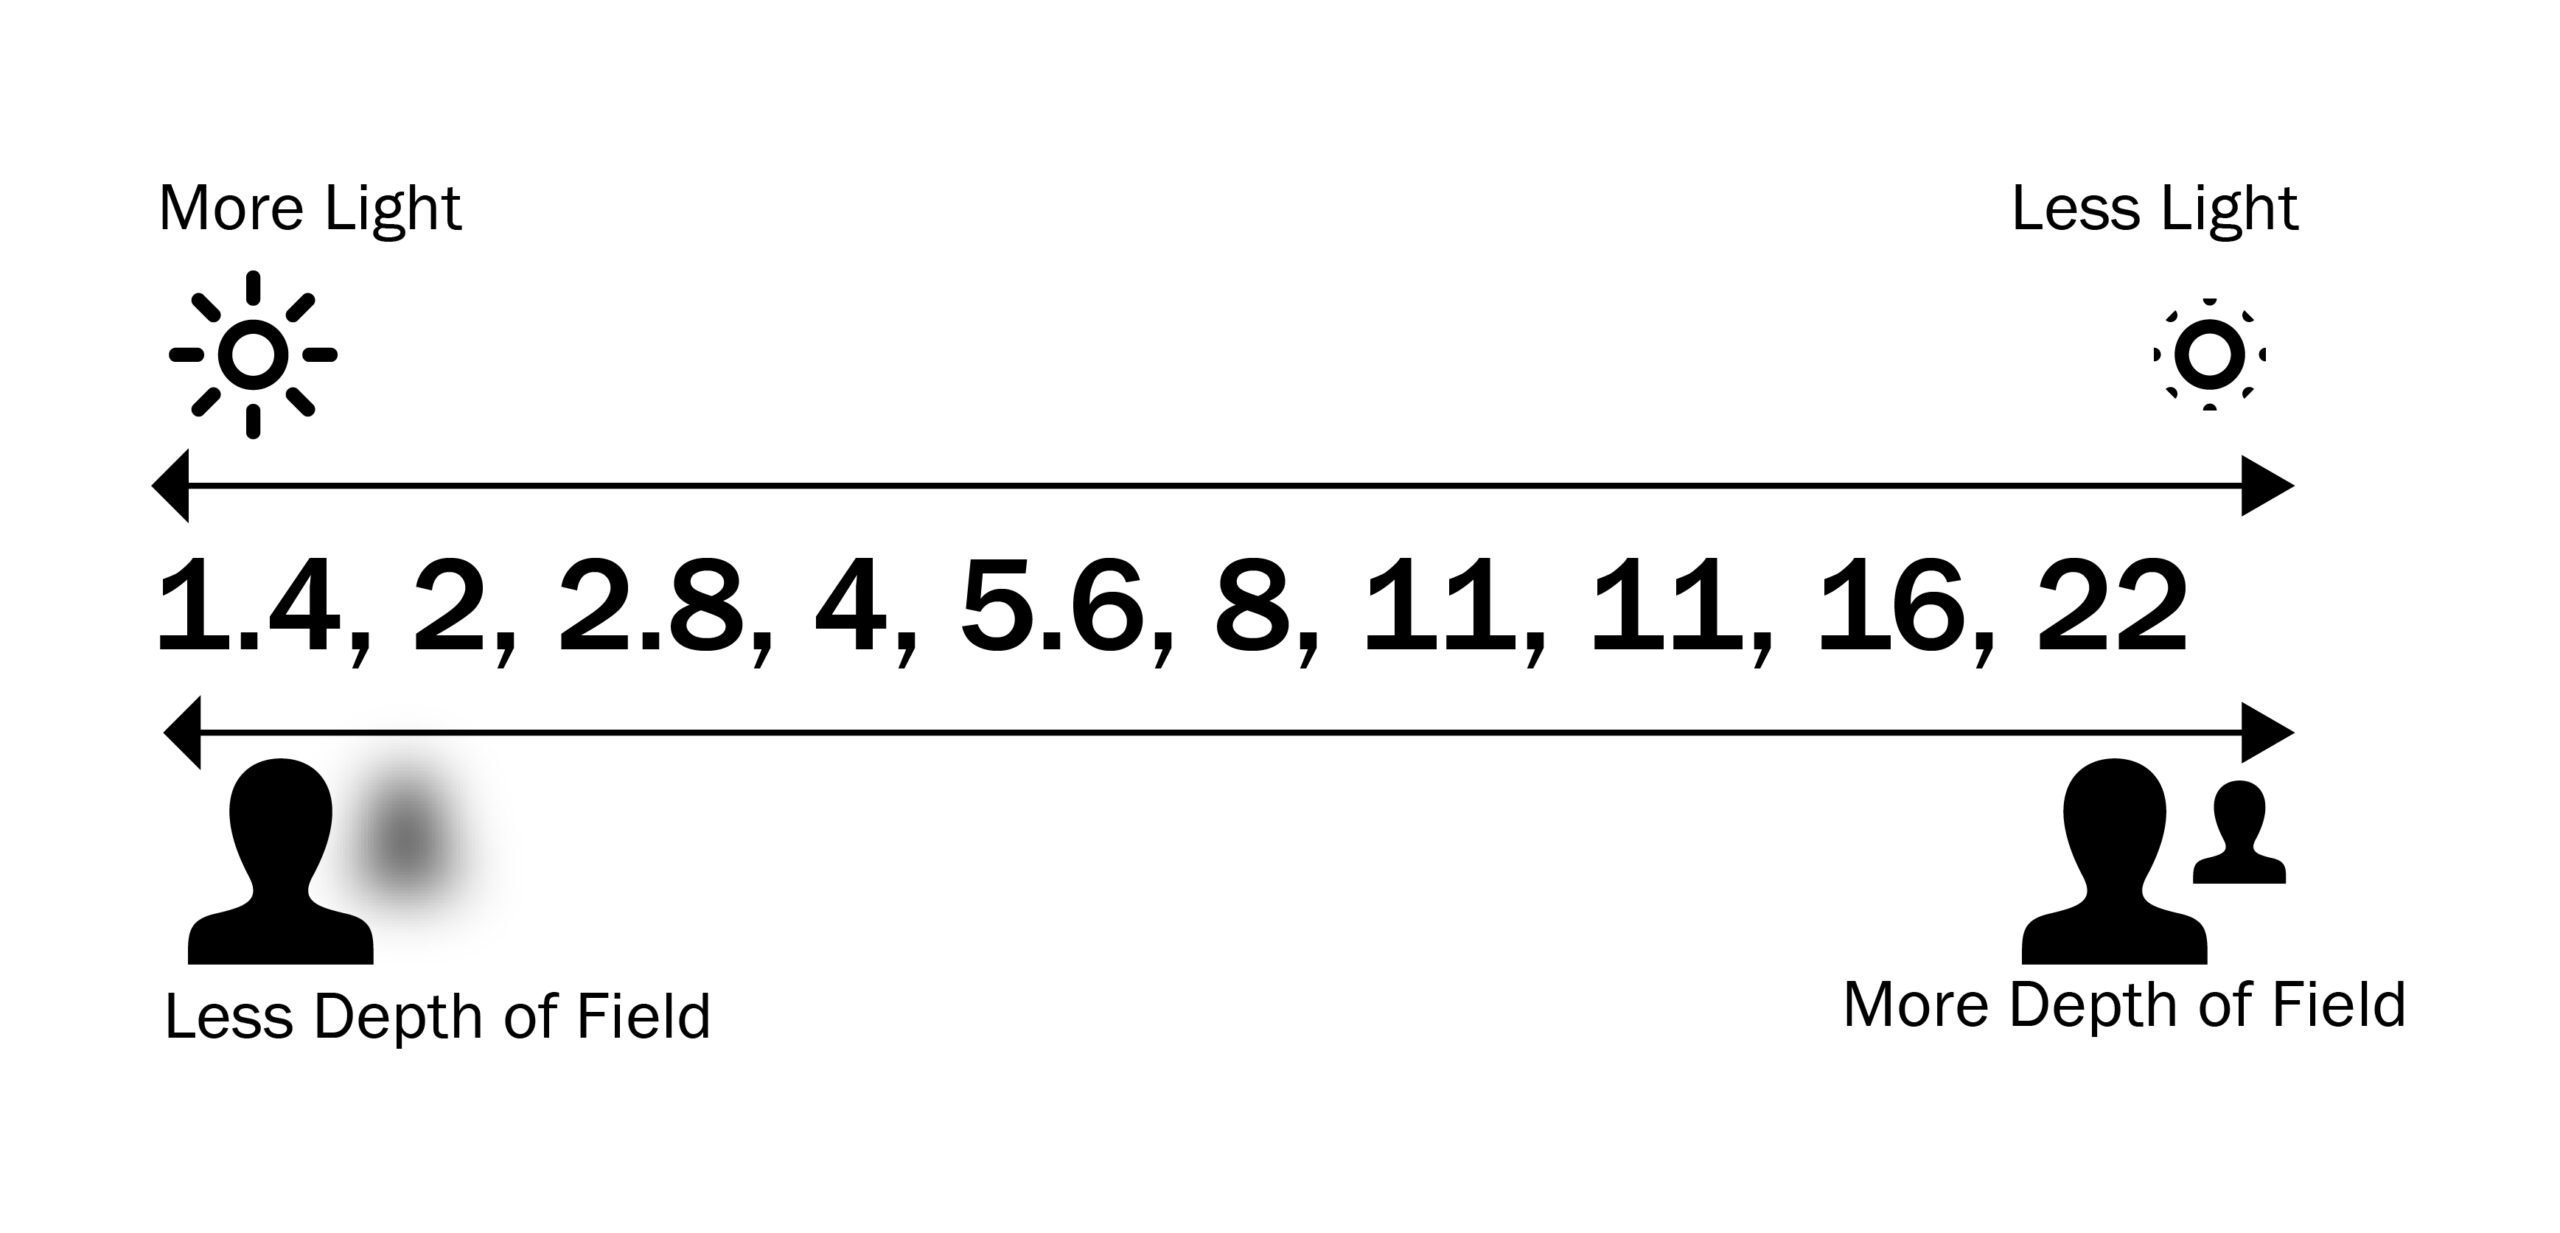
Big aperture (e.g. f/2) = more light and less depth of field
Small aperture (e.g. f/16) = less light and more depth of field
Bigger apertures like f/1.4, f/2.8 bring in more light, but have smaller depths of field. Smaller apertures like f1/16 or f/22 bring in less light but have deeper depths of field.
My aperture Preferences For Street Photography
In my street photography, I prefer middle apertures like f/5.6 and f/8 to get more of the frame in focus. I shoot a lot in manual focus, so the added depth of field also helps gives me a little bit of wiggle room when I miss critical focus.
Here is an example where I tried to get most of the scene in focus with a smaller aperture. You can see all the elements have definition which I think adds to the overall aesthetic of the scene.
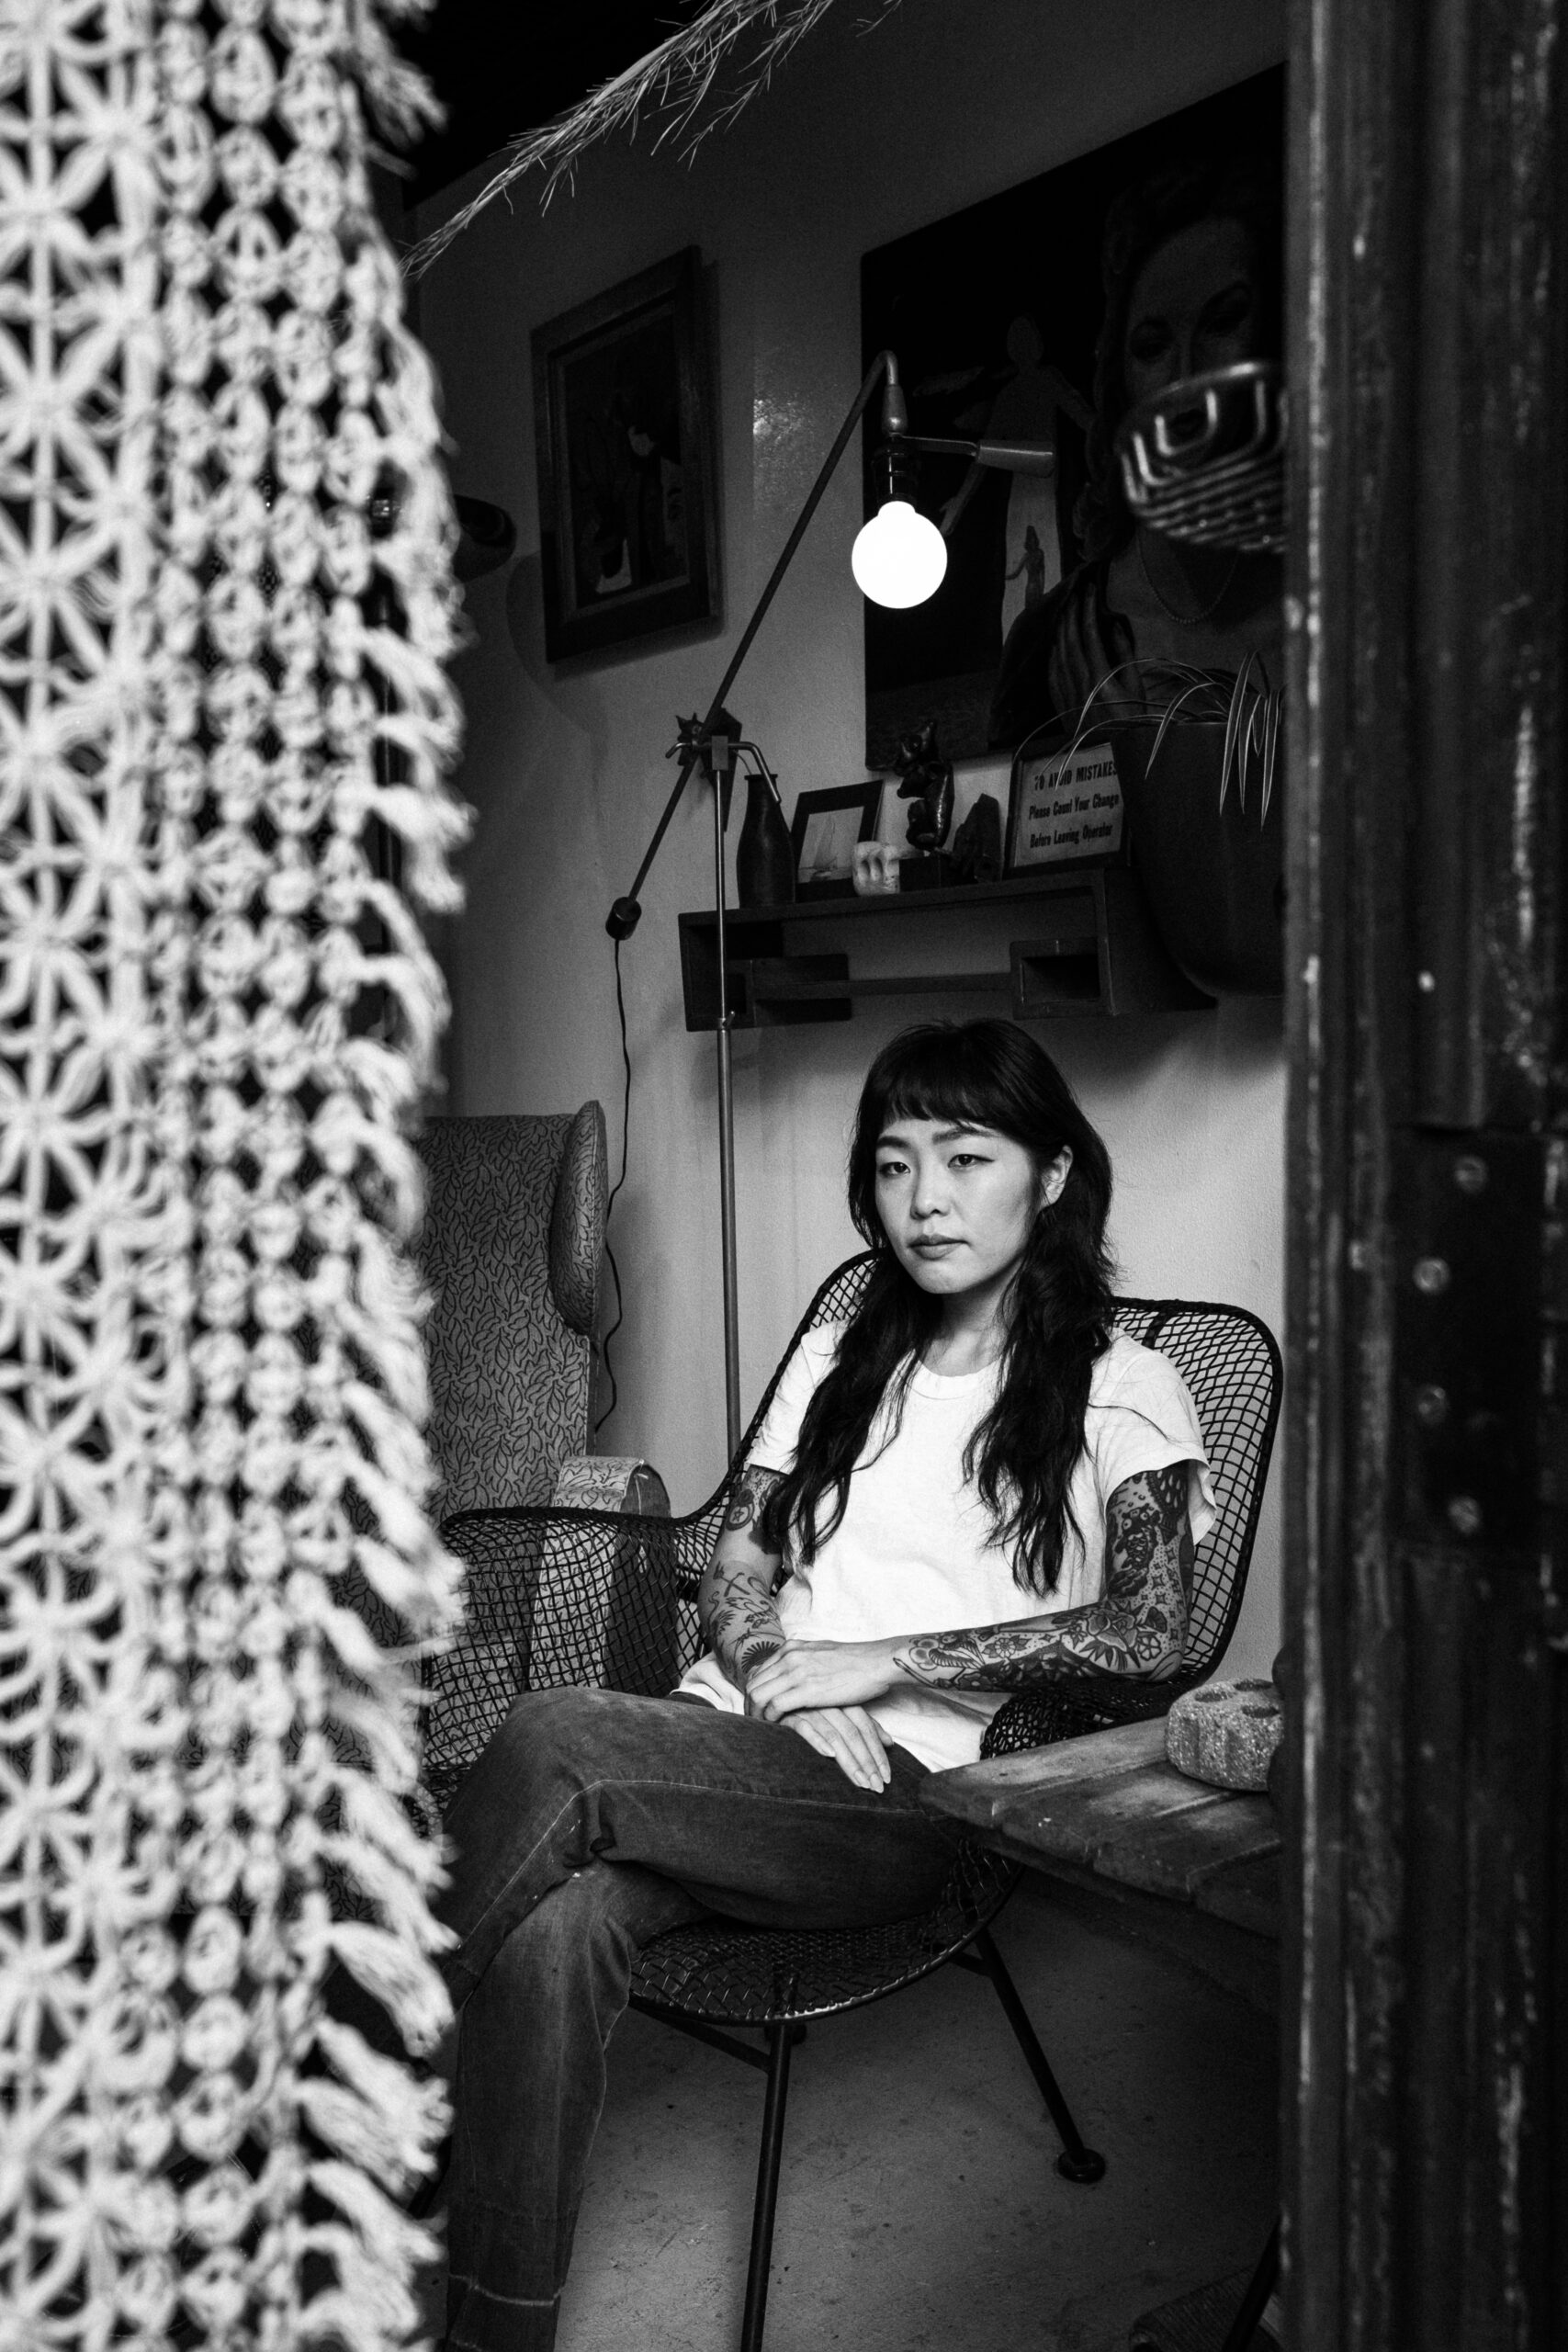
However I often use bigger apertures for street portraits or if an aspect of the scene is too busy. Here is an example where I wanted the woman in sharp focus but the curtain in front to be less sharp as to avoid drawing too much attention away from the woman.
This is all about taste, so experiment and have fun with it. They are only photographs after all!
ISO or ASA
Now that we got shutter speed and aperture out of the way. We move on to the last setting, ISO or sometimes on older cameras called ASA.
ISO is how sensitive your sensor or film is to light.
Low ISO = lower sensitivity to light (less light)
High ISO = higher sensitivity to light (more light)
When shooting on film your ISO is determined by your film stock. For example, a roll off Kodak Portra 160 is rated at 160 ISO. While shooting this film, your ISO must remain set at 160 ISO for your photos to be correctly exposed. There are some advanced techniques that you can use to get around this limitation, but that is for another video.
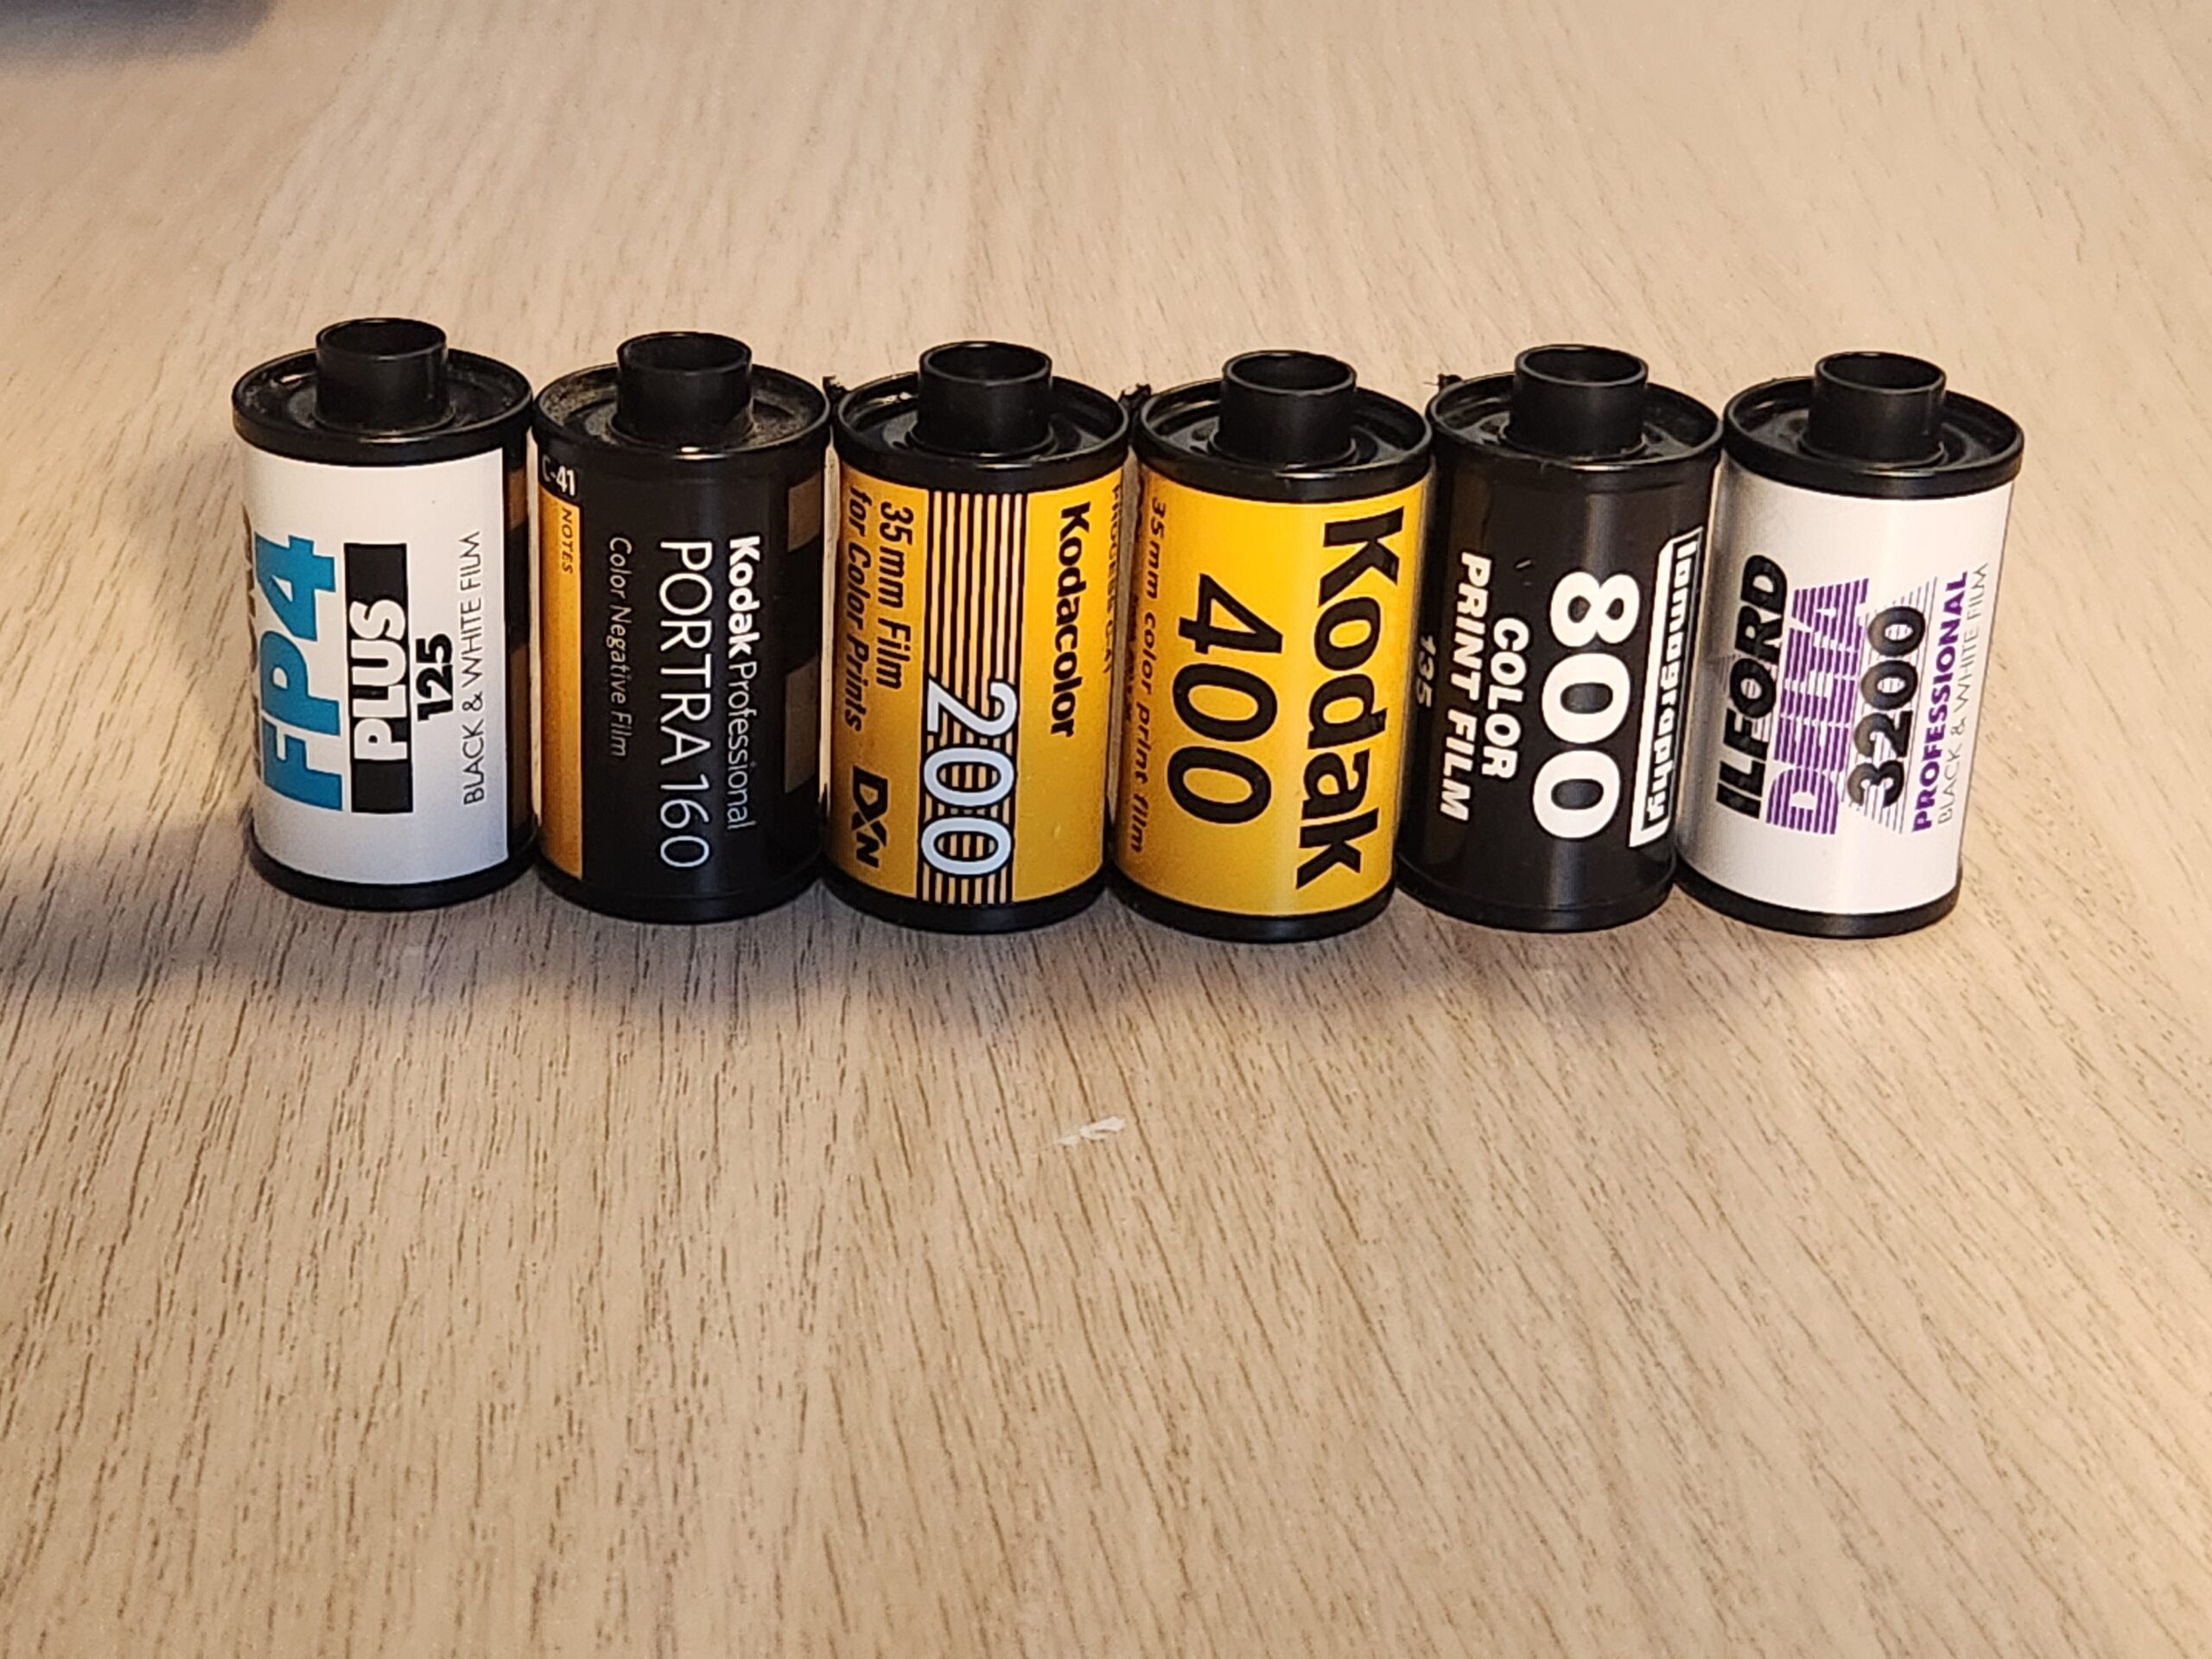
Film stocks in various ISO levels ranging from as low as 125 all the way to 3200.
For those of you shooting on digital, ISO is a much more flexible tool in the exposure arsenal for you to manipulate as you can change it on the fly.
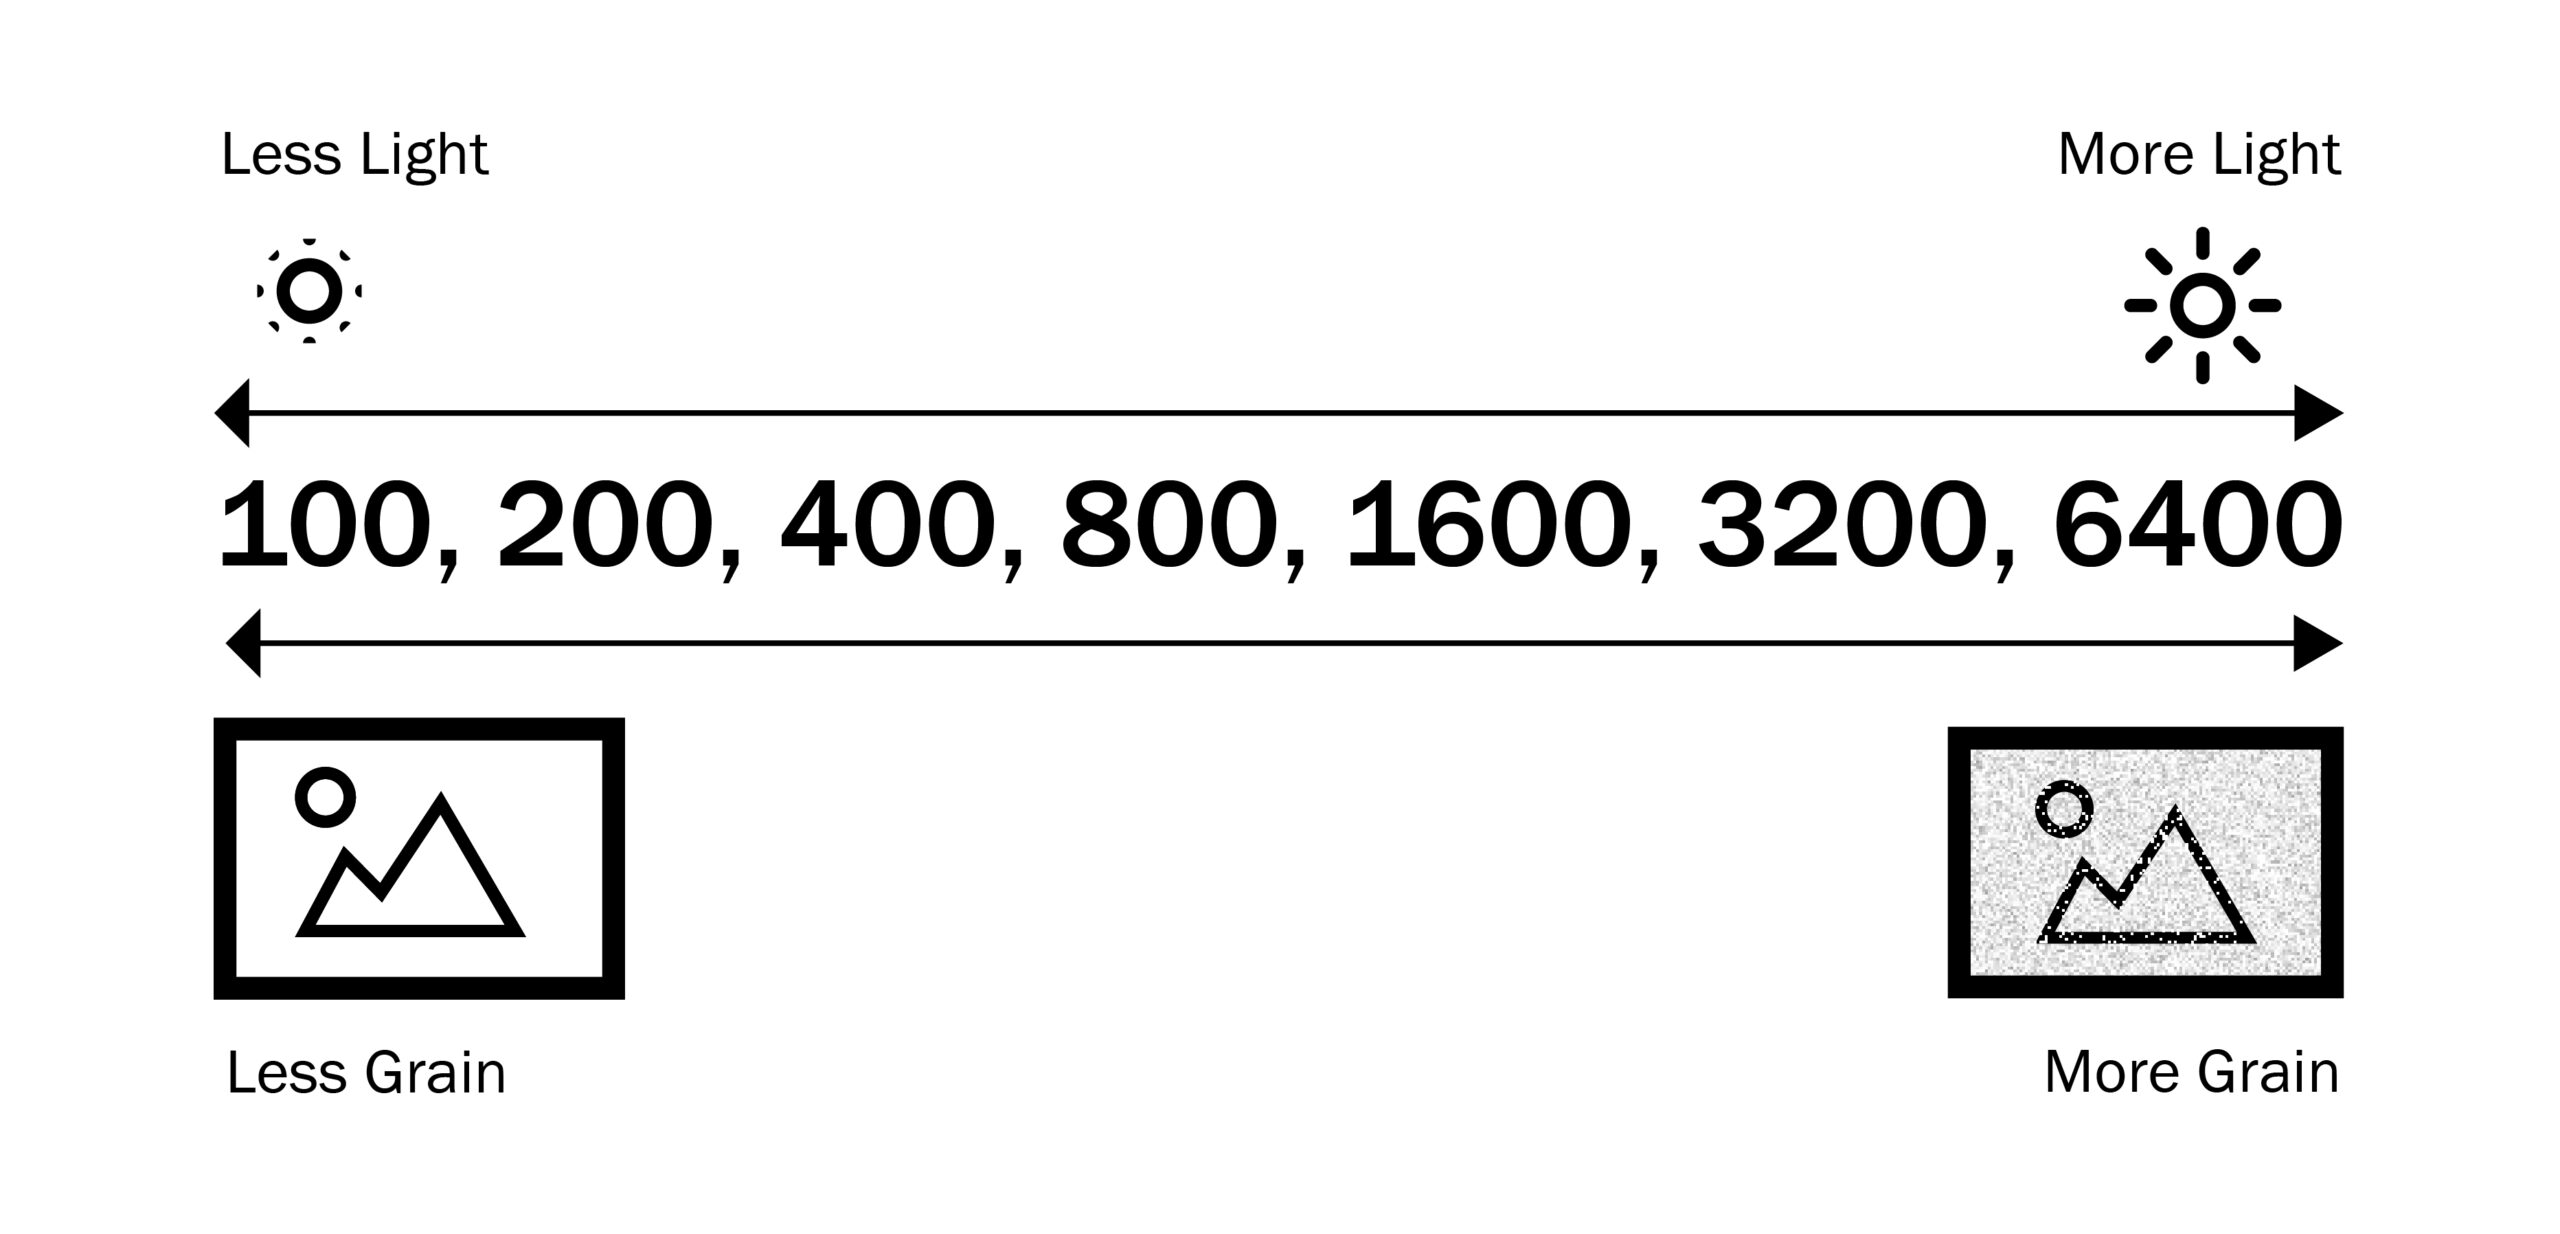
Light sensitivity is measured on a scale using numbers as shown below.
100, 200, 400, 800, 1600, 3200, 6400
Notice the doubling. Again, each of these represents a “stop” of light. As with the other settings your camera may have subdivisions of these numbers.
So, let’s say the photo I am composing is 1 stop overexposed and I am at 1600, dropping my ISO to 800 will bring down to perfect exposure.
Grain
Now you might be thinking, this is awesome. I can adjust the other two settings and and just manipulate ISO to dial in my exposure.
The dilemma is that as ISO goes up, so does your image’s graininess.
Low ISOs like 200 or 400 = generate less grain.
High ISOs like 3200 or 6400 = generate more grain.
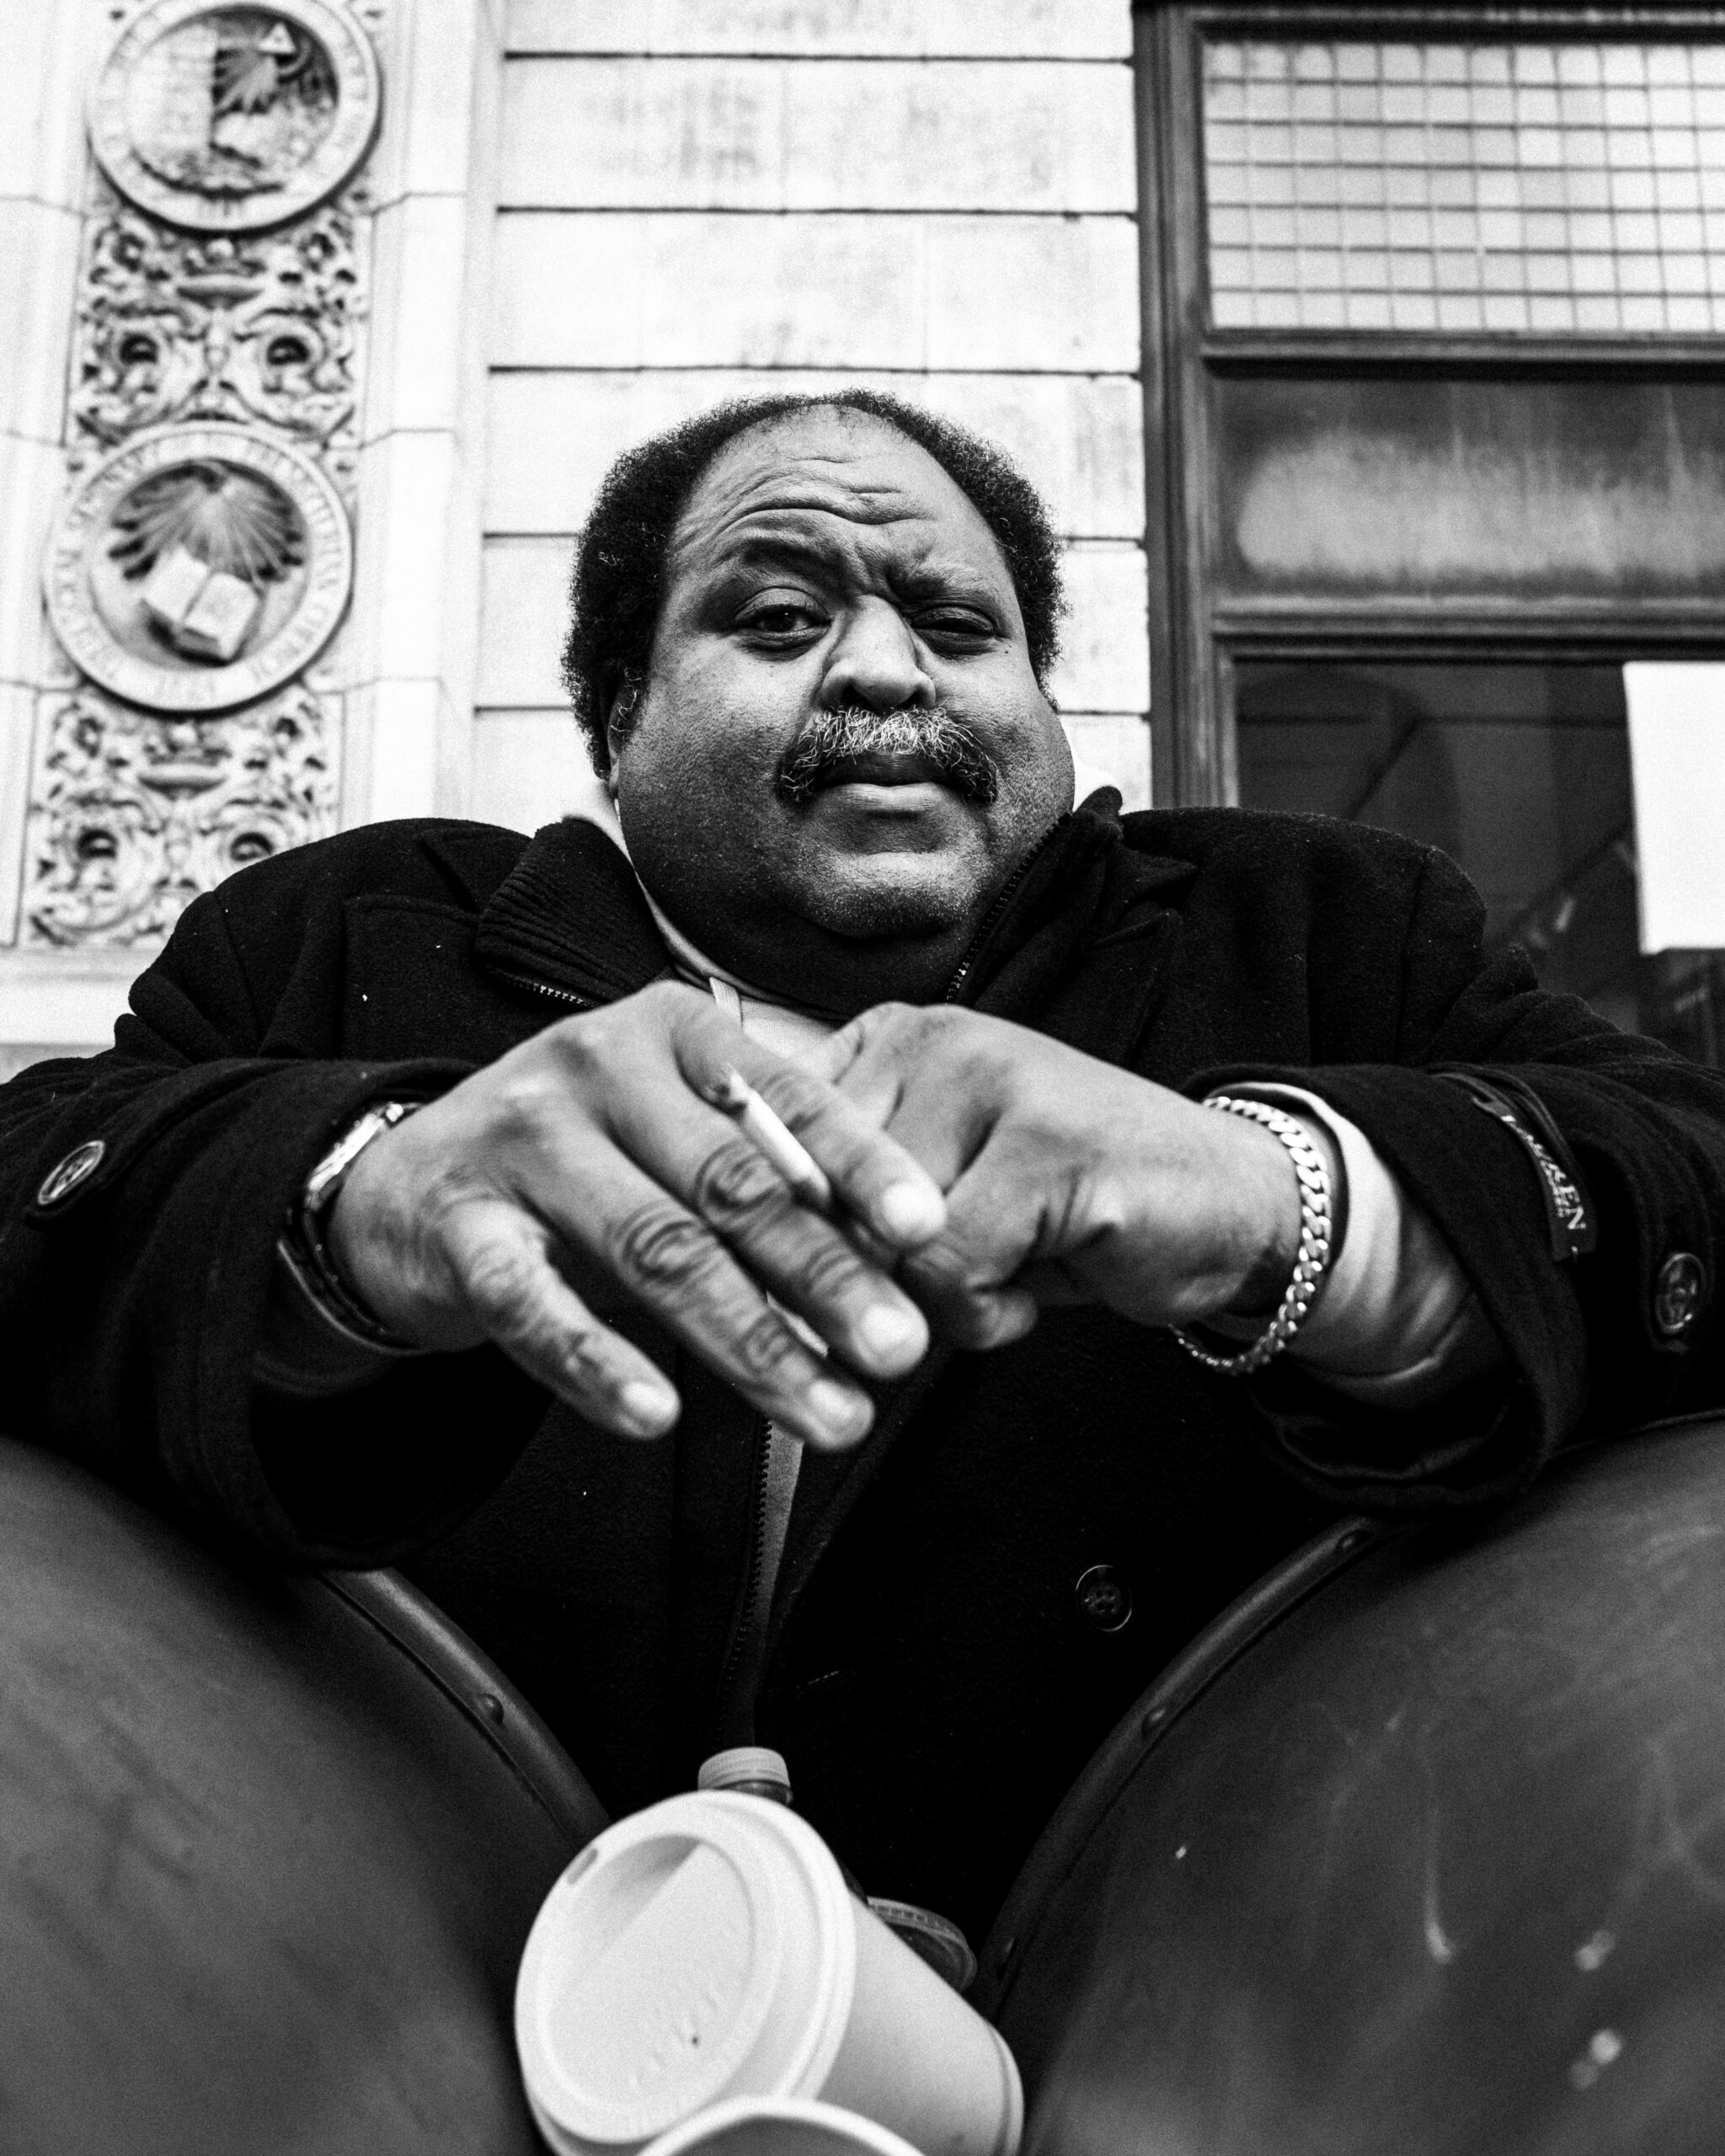
Let’s take a look at this image I shot at 400 ISO, it is relatively clean looking and the grain is low.
However, this image I shot at 6400 has a bit more of a chunky grainy look. It may not be as apparent on smaller viewing devices, but on larger print outs of this photograph it can become more apparent.
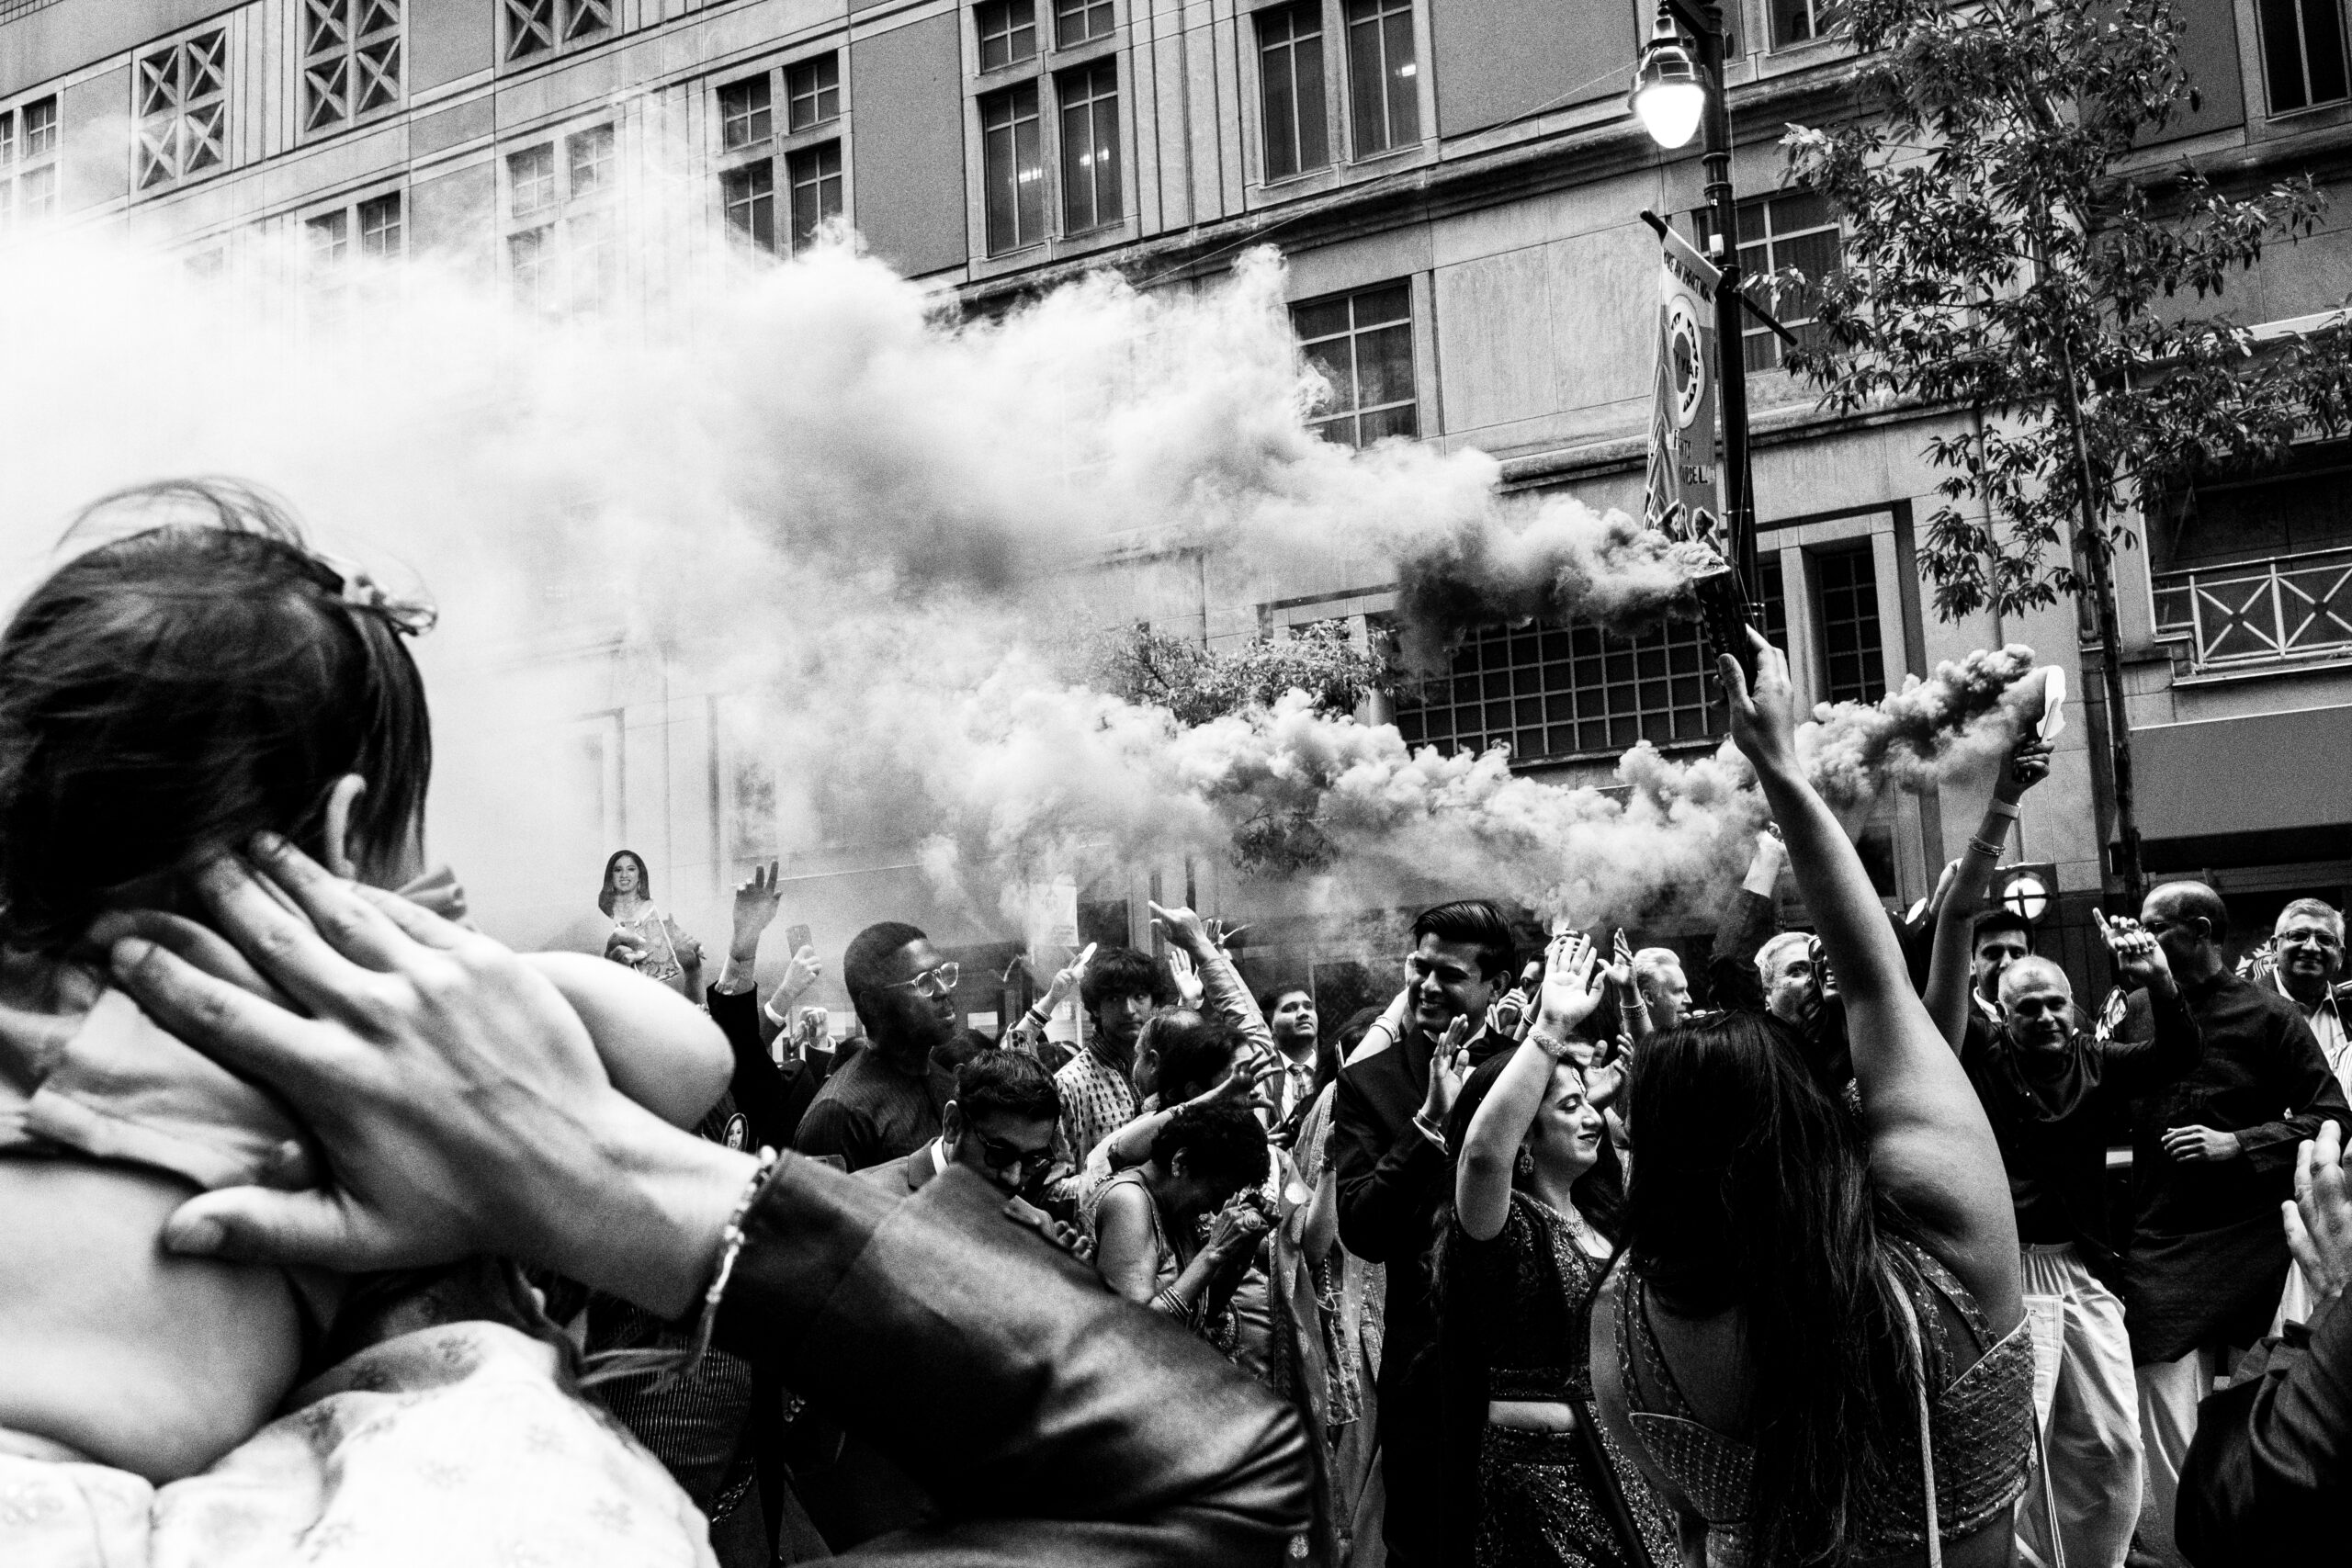
Depending on the look you are going for this can actually be something that adds to the image’s appearance or detracts from it.
My ISO Preferences For Street Photography
I hate to bring up gear, but this is one of those situations where it may help to explore the limitations of your equipment.
On digital cameras, I would spend some time shooting at a variety of ISO’s in various lighting conditions to see at which point high ISO begins to ruin your image.
For example, I found that at 3200 on my Fujifilm X-Pro 2, is at about the upper end of what a good color image can be at before the grain looks too ugly for my taste. However, in black and white I am okay with the graininess up to 6400.
For you film folks, try different films or pushing and pulling, which we can discuss in another lesson later, to get different looks that works for the types of images you want to make. Some films perform better than others and it is just matter of figuring out what works for your style of shooting.
In terms of which ISO I shoot at specifically, this is one setting that varies the most for me. Since I am not afraid of a little grain in my images, I tend to shoot at higher ISOs. Most of the time I set my camera at 1600 ISO and adjust from there. If the weather is overcast and I still want a fast shutter speed and higher aperture (f/5.6 or f/8), then I would bump things up to 3200. Of if it is a super sunny day, then I would drop to as low as 400 ISO.
Street photography is pretty wild, you can experience some seriously different lighting conditions on the same block. It is about finding which aspects of your image you are willing to be flexible with and grain is one of those that I am most flexible on.
Balancing Your Exposure
Now Let’s bring it all together before we hit the streets.
When you make any photograph you are balancing all 3 of these elements simultaneously. As you can see in the diagram, you can only fully control light when you balance all 3 of these settings.
To recap, we use shutter speed to control how long our camera is open for, which controls motion blur. We use aperture to control how big of an opening our camera has and how much is in focus. We use ISO to control how sensitive our camera is to light and how grainy our image is.
When we make changes to any one setting it affects our exposure and we must compensate by adjusting one or two of the other settings.
For example if the scene has some crazy action I want to freeze, then I will have to increase my shutter speed. However to keep an even exposure, I will either have to open my aperture up, increase my ISO, or do a bit of both.
Or if I spot a good portrait and I want to open up my aperture for a shallower depth of field. I will have to either increase my shutter speed, drop my ISO, or a little bit of both to compensate for the additional light.
It is all a balancing act, so the Venn diagram is a good way for us to visualize how all these changes relate to one another.
Now that you hopefully understand manual exposure a bit better, I have some final things to bring this all full circle.
Homework
First up is your homework! I know, you did not expect to get any today. But if you do it, I will critique it! I know this may not be sustainable if a ton of people take me up on this, but I will try and pop in as often as possible to give you feedback. Or if other folks who have completed the lesson want to chime in, I would love that too!
So, this week’s homework is to take the following photos:
- Photo with motion blur
- Photo with motion frozen
- Photo with shallow depth of field
- Photo with deep depth of field
- Photo with high ISO
- Photo with low ISO
But try and have fun with it and make them creative and don’t just take 6! Shoot a bunch and pick your 6 favorites. You won’t learn anything if you don’t experiment. I think you will get a lot out of this exercise because it forces you to try out all aspects of exposure Venn diagram.
Looking Ahead
I know it was a lot of information, but once you get the hang of it, it becomes second nature. Keep on the lookout for a follow up that goes more in depth on how we can use our manual mode skills with our meter to tackle complicated lighting situations while out on the street.
Until then, stay creative!